Table of Contents
Retrieving an Azure Key Vault Secret
In this post we will create Secrets within the Azure Key Vault and then retrieve this within an Azure Trigger.
Function App Identity
However before we can set up the Key Vault we need to go back to the Function app previously created and define an Identity for it. To get started log into your Azure Services portal and select Functions App.
This identity is just like your Microsoft identity and is added to active directory. Since the function is executed from the cloud by some process, this process wont have permissions to access the Key Vault. SO were going to create a Microsoft Identity for the Function and then allow this user to access the Key Vault. This is a service user account is my best analogy.
Navigate to the Function Previously Created, and then select the Identity menu item

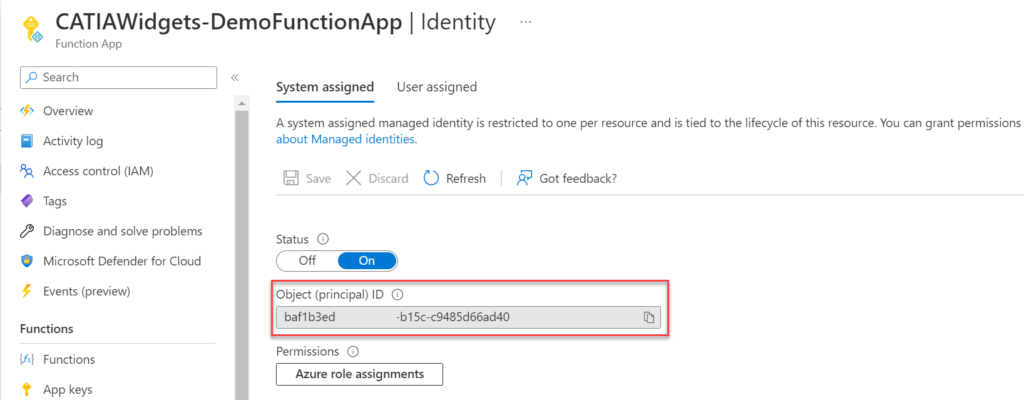
Within the Identity page set the status to On, and then select Save.

When the Message is shown to Enable System Assigned Managed Identity is shown, select Yes.

Once the identity is created we will be able to see the ID number for the identity, take note of this well need it later.
Creating Azure Key Vault Secrets
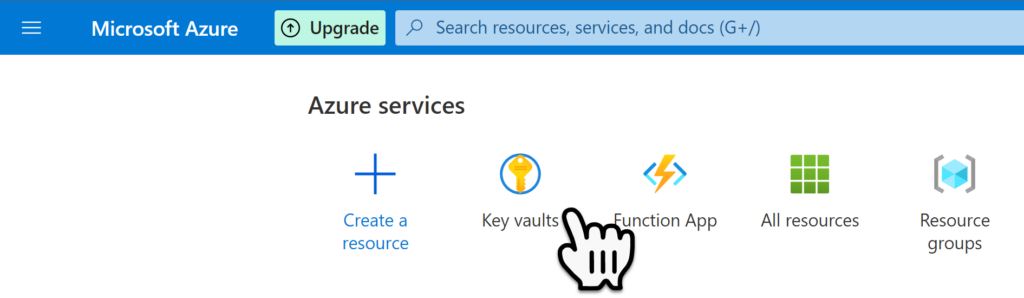
Next, navigate to the Key Vaults app.
Creating a New Key Vault
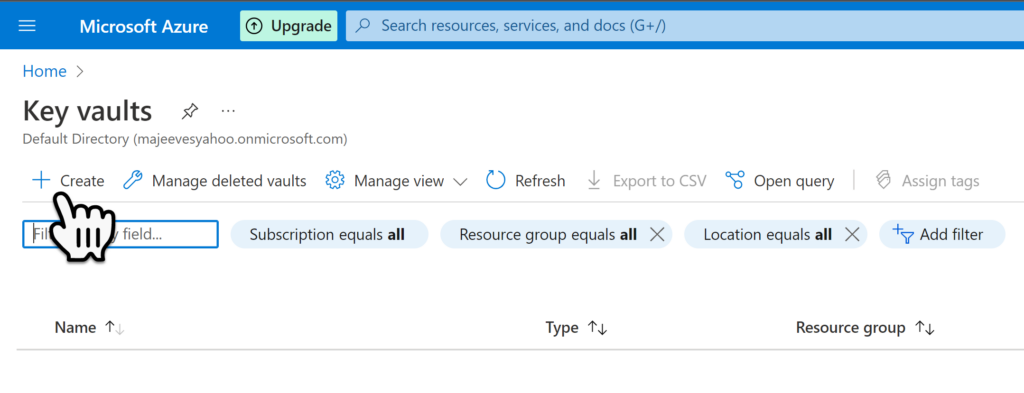
To create a new Key Vault that will contain one or more secrets, select the Create menu item.
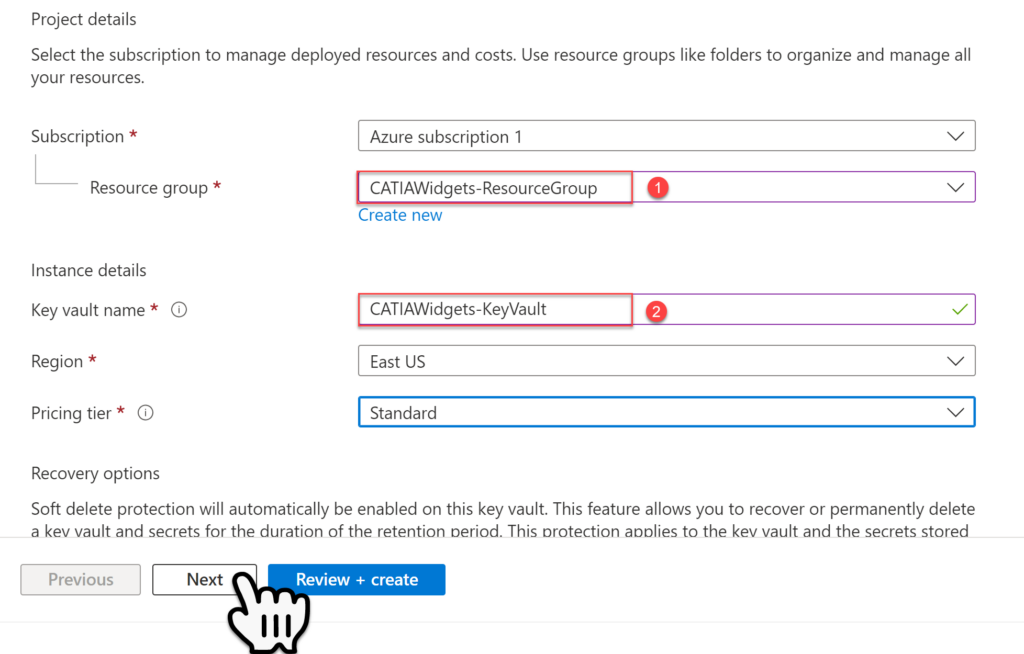
Within the Key Vault Basics creation page, select the same Resource Group previously create in the last post, and then define a new Key Vault Name, then select Next.
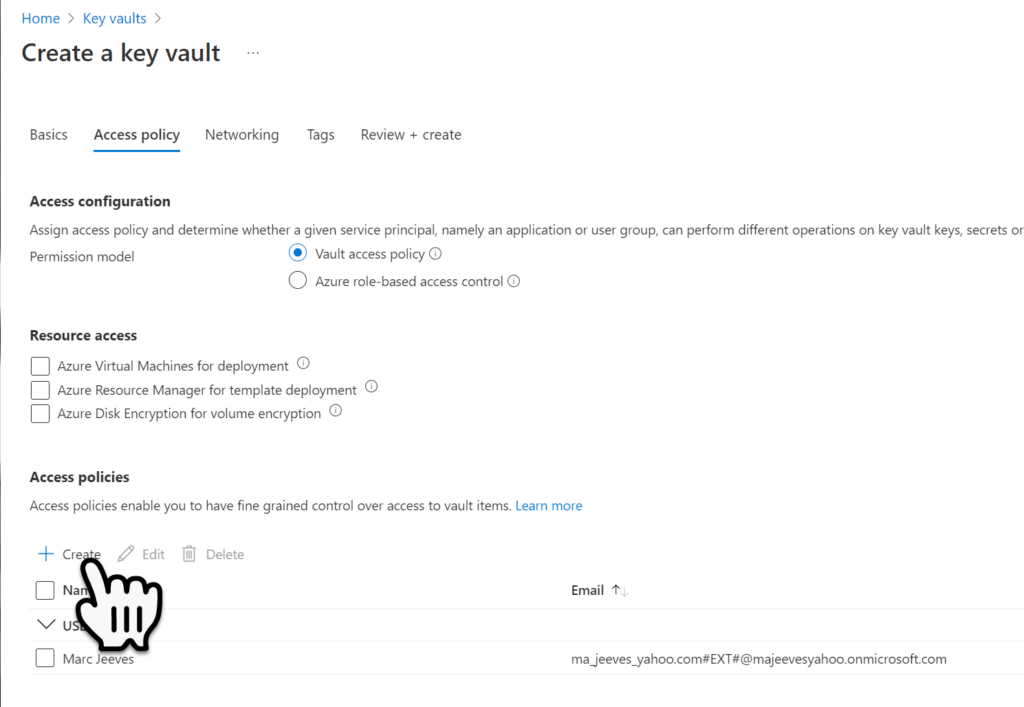
Within the Access Policy page, select the Create policy button.
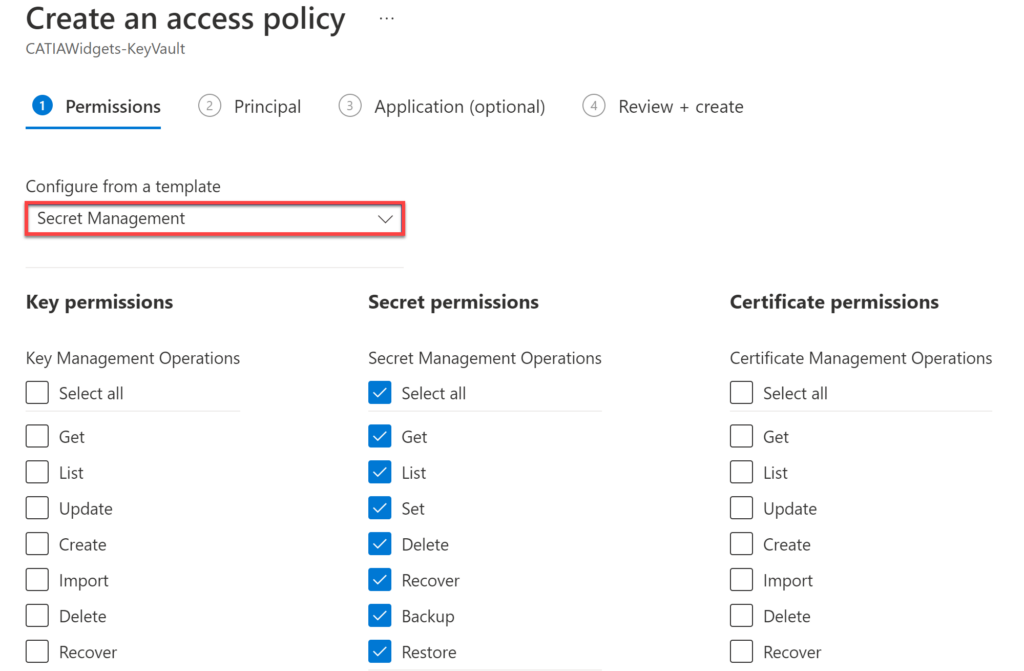
Within the Access Policies Permissions page set the Template to Secret Management, then select Next.
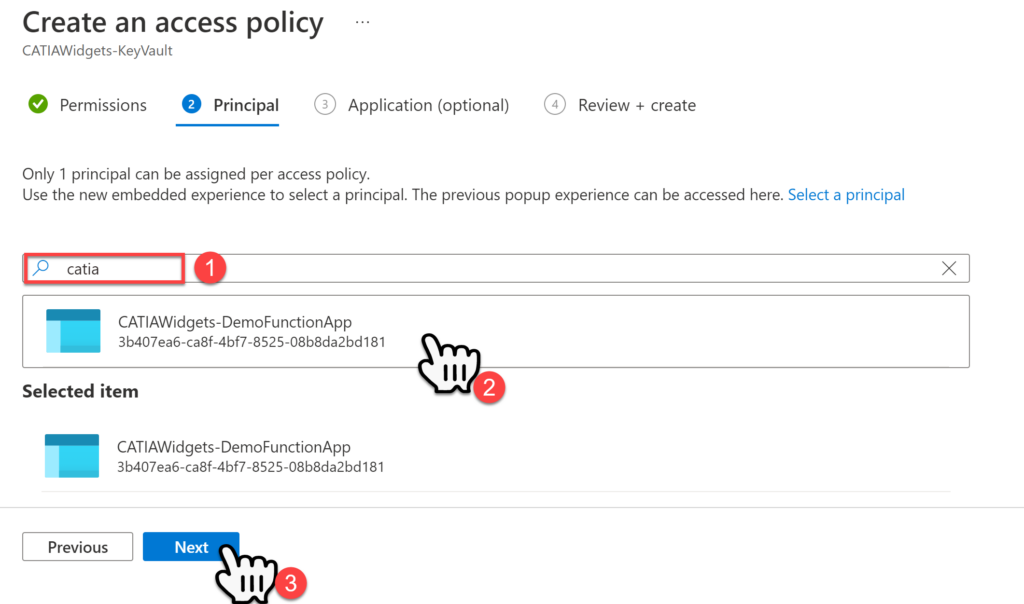
Within the Access Policies Principle page, key in a portion of the Function Name, and then select the function from the provided list, then select Next.
In the Application (Optional) page just go-ahead and select Next, then select Create in the Review and Create page.
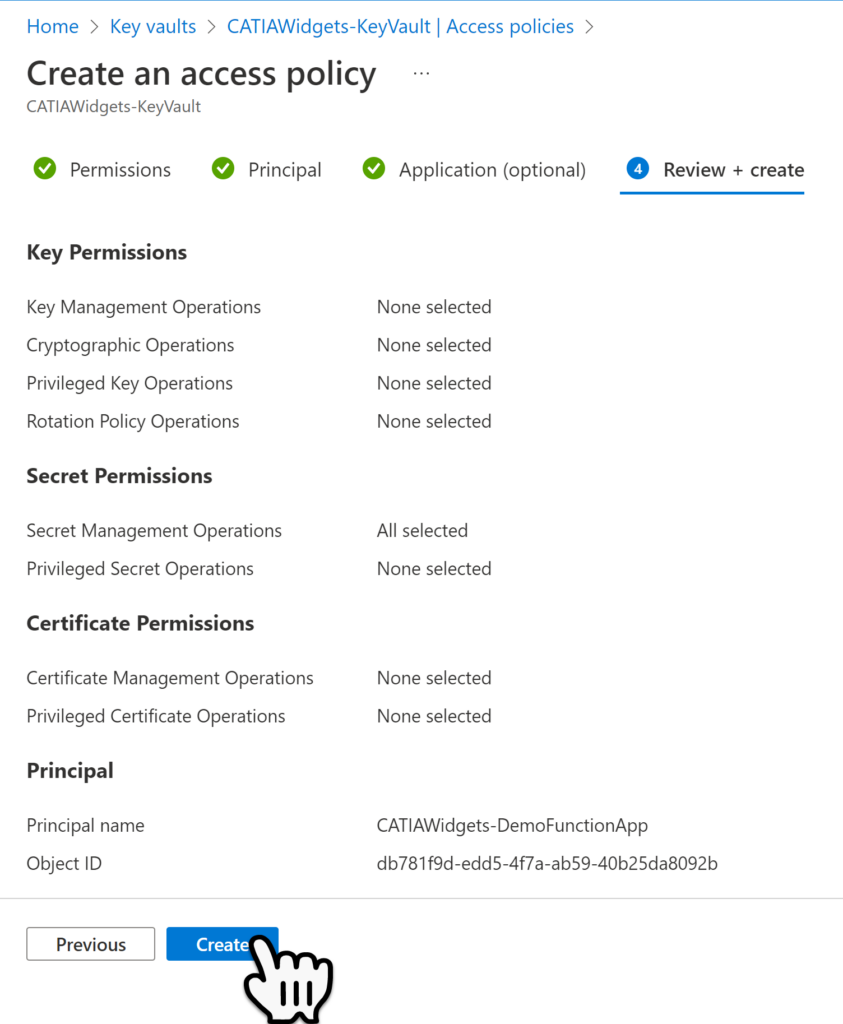
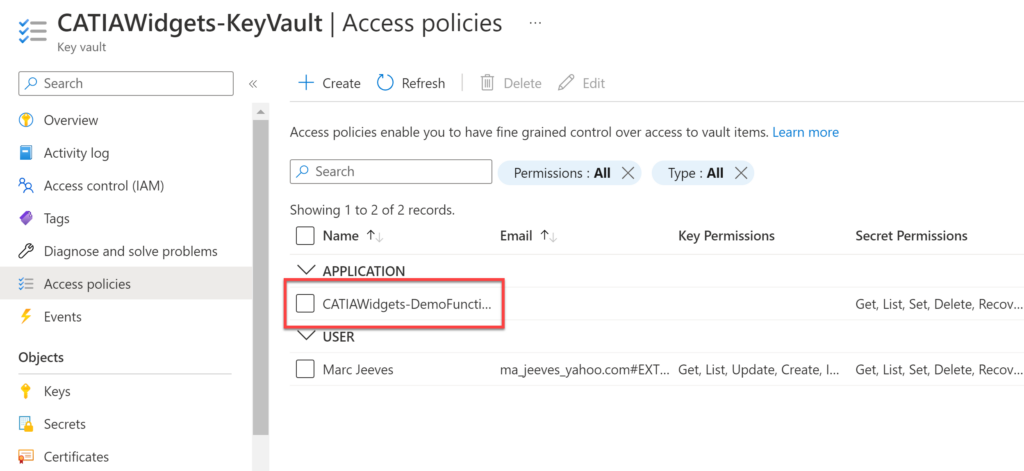
We can now see that that Function Identity has been added to the Key Vault Access Policies.
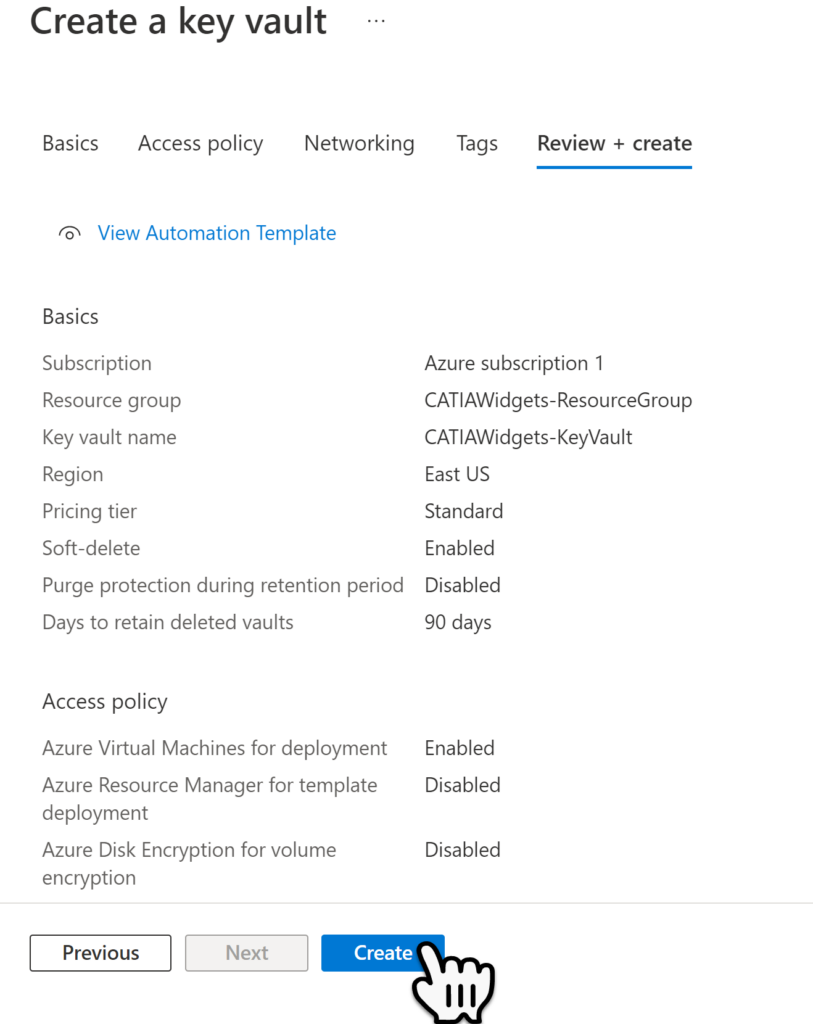
Select the Review + Create button to navigate tot he next page. Then in the Review + Create page select the Create Button, to finalize the new Key Vault.
Adding Secret Keys to the Key Vault
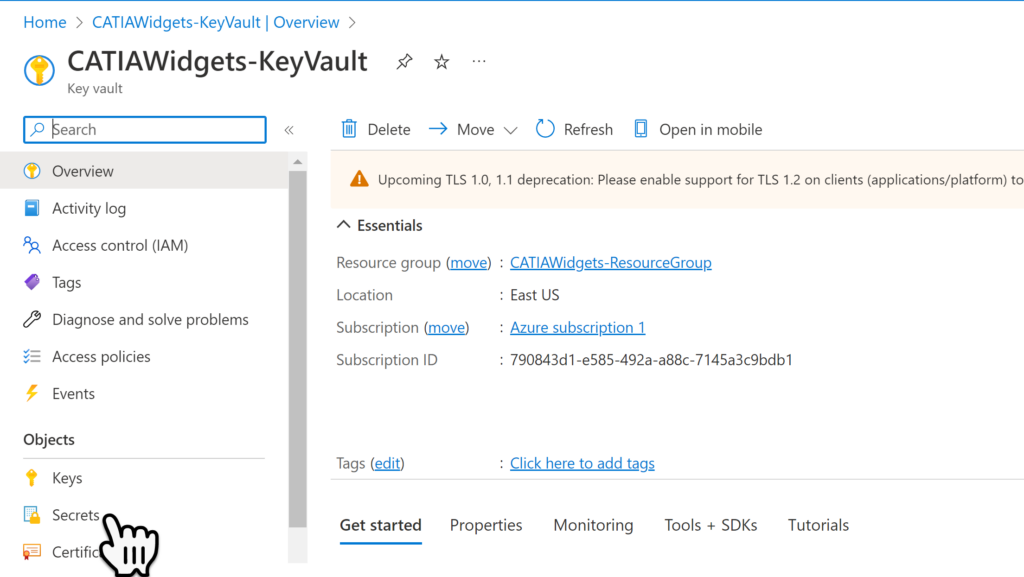
Once the deployment is finished, Select Go to Resource.

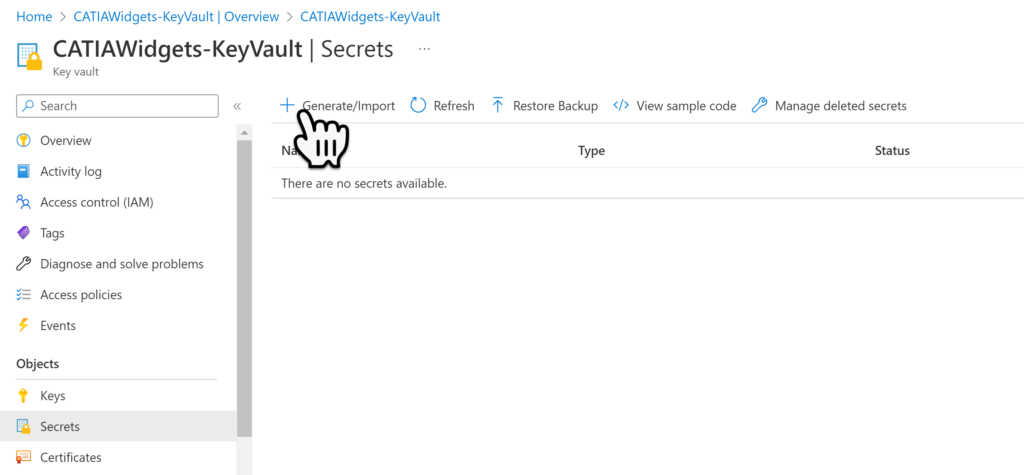
Within the new Key Vault, select the Secrets menu item.
To add a new Secret select the Generate / Import menu item.
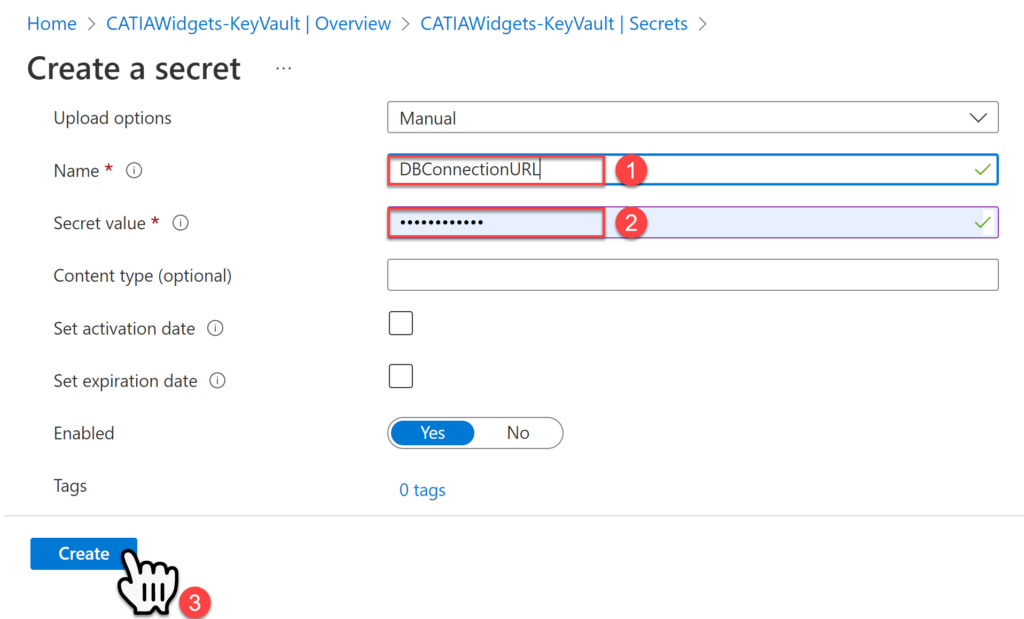
Within the Create a Secret page key in a Name, and Value for the new secret. At this point we can provide any random value, later on we will use real values, then select Create.
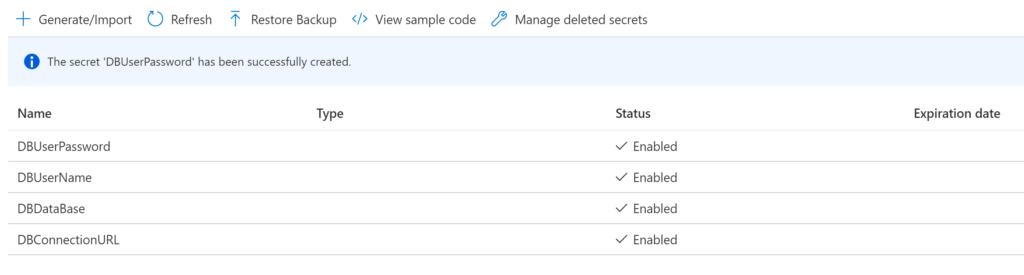
Repeat this process to create all four secrets as shown below.
Updating the Function Code
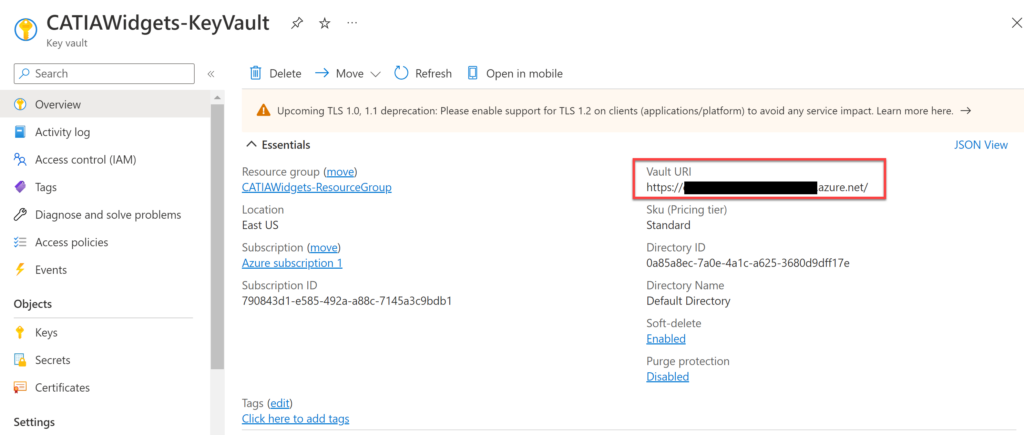
Navigate back to the Key Vault, previously created and select the Overview menu item. Then copy the Key Vault URI, this will be needed to access the secrets within the Key Vault when we write the C# code.
Within Visual Studio open the Function App previously created, and delete nearly everything from the function as shown below.
 [FunctionName("Function1")]
        public static async Task<IActionResult> Run(
            [HttpTrigger(AuthorizationLevel.Function, "get", "post", Route = null)] HttpRequest req,
            ILogger log)
        {
            log.LogInformation("C# HTTP trigger function processed a request.");

            return new OkObjectResult(responseMessage);
        }
Next, add the following two namespaces, these contain the API we need to access the secrets within the Key Vault.
using Azure.Identity;
using Azure.Security.KeyVault.Secrets;
To access the Key Vault we will use the Key Vault URI previously copied and create a string called KeyVaultURI or kvUri equated tot he Key Vault URI path.
string kvUri = $"https://catiawidget-keyvault.vault.azure.net/";
So our code should now look like this.
using System;
using System.IO;
using System.Threading.Tasks;
using Microsoft.AspNetCore.Mvc;

using Azure.Identity;
using Azure.Security.KeyVault.Secrets;

using Microsoft.Azure.WebJobs;
using Microsoft.Azure.WebJobs.Extensions.Http;
using Microsoft.AspNetCore.Http;
using Microsoft.Extensions.Logging;
using Newtonsoft.Json;

namespace DemoFunctionApp
{
    public static class Function1
    {
        [FunctionName("Function1")]
        public static async Task<IActionResult> Run(
            [HttpTrigger(AuthorizationLevel.Function, "get", "post", Route = null)] HttpRequest req,
            ILogger log)
        {
            log.LogInformation("C# HTTP trigger function processed a request.");

            var kvUri = $"https://catiawidget-keyvault.vault.azure.net/";

            return new OkObjectResult(responseMessage);
        }
    }
}
Next we will use this Key Vault URI to access the Secrets, and print the secret out for the response message.
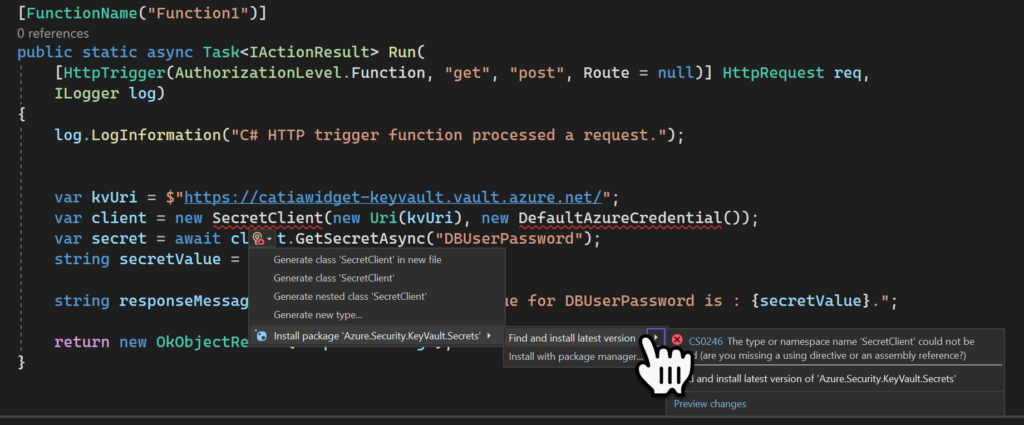
First we use the Key Vault URI to cerate a new SecretClient, and then using the Name of the Secret we can retrieve it value.
            log.LogInformation("C# HTTP trigger function processed a request.");

            string kvUri = $"https://catiawidget-keyvault.vault.azure.net/";
            var client = new SecretClient(new Uri(kvUri), new DefaultAzureCredential());
            var secret = await client.GetSecretAsync("DBUserPassword");
            string secretValue = secret.Value.Value;

            string responseMessage = $"Hello, the secret Value for DBUserPassword is : {secretValue}.";

            return new OkObjectResult(responseMessage);
When we added the two Namespace we did not use NuGet to install the packages hover the mouse over Secret Client and select Find and Install the Latest Version, from the contextual menu. Repeat this for the other error (DefaultAzureCredential).
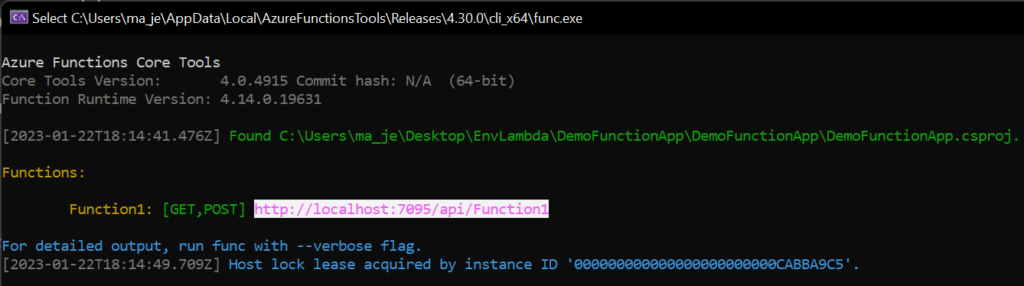
Let run this on the local machine first to see if we can connect to the Key Vault and the secret. When this runs the local host path for the function will be displayed copy this and paste it into a Google Chrome browser page.
We can now see the value for our secret printed out, this however is only one secret.

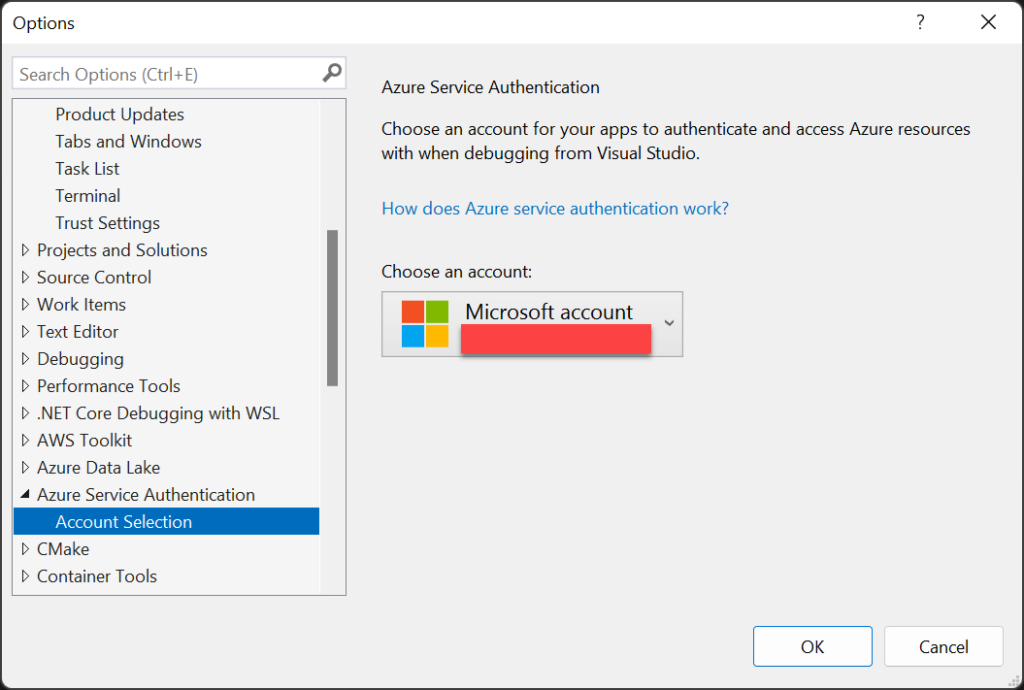
If it fails check in the Visual Studio options that the Azure Service Authentication -> Account Selection is set tot he same account that you log into Azure with. The first time I did this it would not work locally but would work once I published the code to Azure.
I created a simple class that has two methods, the first retrieves a single secret and the second retrieves a dictionary of secrets based on a list of secret names.
using Azure.Identity;
using Azure.Security.KeyVault.Secrets;

using System;
using System.Collections.Generic;
using System.Threading.Tasks;

namespace DemoFunctionApp
{
    public class SecretsManagement
    {
        private readonly string _keyVaultURI = String.Empty;
        public SecretsManagement(string keyVaultURI)
        {
            _keyVaultURI = keyVaultURI;
        }

        public async Task<string> GetSingleSecretAsync(string secretName)
        {
            var client = new SecretClient(new Uri(_keyVaultURI), new DefaultAzureCredential());
            var secret = await client.GetSecretAsync(secretName);
            return secret.Value.Value;
        }

        public async Task<Dictionary<string, string>> GetDictionaryOfSecrets(List<string> secretNames)
        {
            if (secretNames != null && secretNames.Count > 0)
            {
                Dictionary<string, string> returnDictionary = new Dictionary<string, string>() { };
                var client = new SecretClient(new Uri(_keyVaultURI), new DefaultAzureCredential());
                foreach (string secretName in secretNames)
                {
                    var secret = await client.GetSecretAsync(secretName);
                    returnDictionary.Add(secretName, secret.Value.Value);
                }
                return returnDictionary;
            }
            return null;
        }
    }
}
Then I modified the Function to use this new class.
using System;
using System.Threading.Tasks;
using Microsoft.AspNetCore.Mvc;
using Microsoft.Azure.WebJobs;
using Microsoft.Azure.WebJobs.Extensions.Http;
using Microsoft.AspNetCore.Http;
using Microsoft.Extensions.Logging;
using System.Collections.Generic;
namespace DemoFunctionApp
{
public static class Function1
{
[FunctionName("Function1")]
public static async Task<IActionResult> Run(
[HttpTrigger(AuthorizationLevel.Function, "get", "post", Route = null)] HttpRequest req,
ILogger log)
{
log.LogInformation("C# HTTP trigger function processed a request.");
string name = req.Query["name"];
string kvUri = $"https://catiawidget-keyvault.vault.azure.net/";
SecretsManagement secretsManagment = new SecretsManagement(kvUri);
List<string> secrets = new List<string>() { "DBUserPassword", "DBConnectionURI", "DBDatabase","DBUserName" };
Dictionary<string, string> secretValues = secretsManagment.GetDictionaryOfSecrets(secrets).Result;
string secretsMessage = string.Empty;
foreach (string secret in secrets)
{
secretsMessage = string.Concat(secretsMessage, Environment.NewLine,
string.Format(
string.Concat("The Secret : ", secret, " Has a Value of : {0}"),
secretValues[secret]));
}
string responseMessage = string.IsNullOrEmpty(name)
? "This HTTP triggered function executed successfully. Pass a name in the query string or in the request body for a personalized response."
: $"Hello, {name}. {secretsMessage}.";
return new OkObjectResult(responseMessage);
}
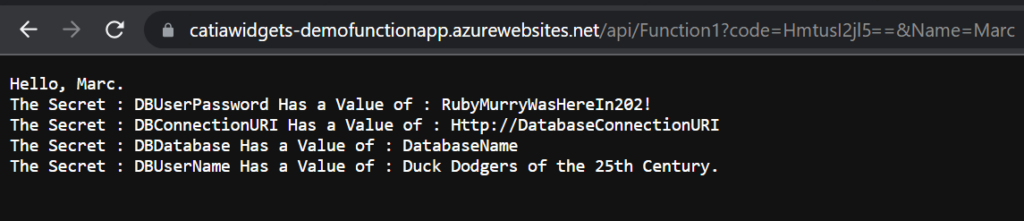
}When this is executed locally I get the following response message.
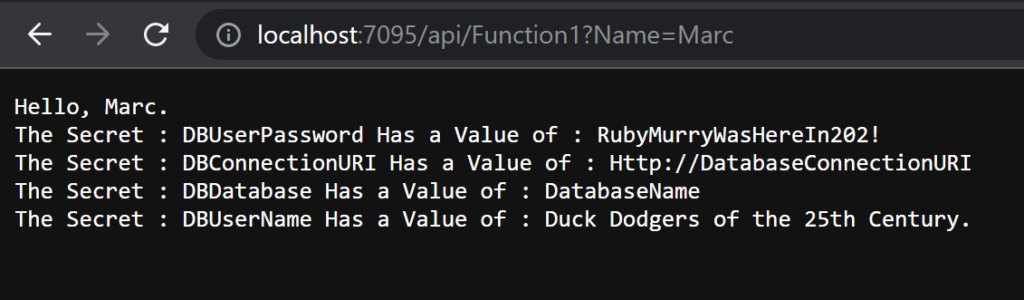
So as a disclaimer, you never want to print to screen secrets or log them here I’m just doing it to show you that it worked. Lets now publish this back to Azure and make sure it works there also.
Final Publication
Right Click on the Solution and Select Publish from the contextual menu, then in the Publish window select the Publish button, then wait (make sure you stop debugging before you publish I forgot first time).
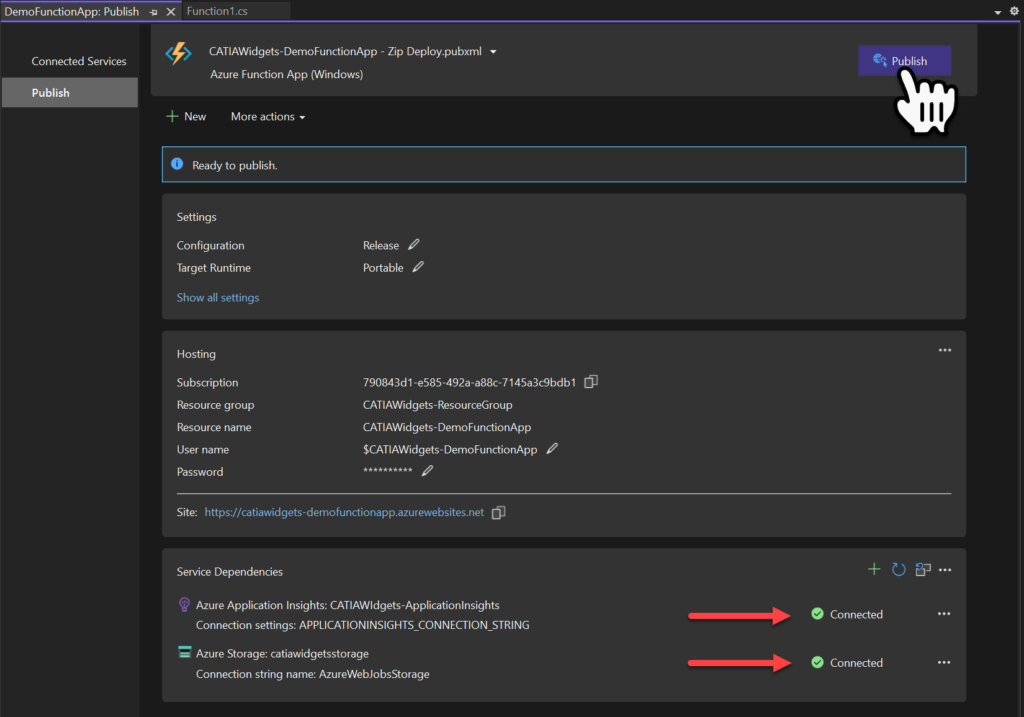
Once its completed, let head back to the Azure Portal, and Navigate back to the Function. As before well get the function URI and paste it into a Chrome tab, with the Name attribute added we should get the same result.
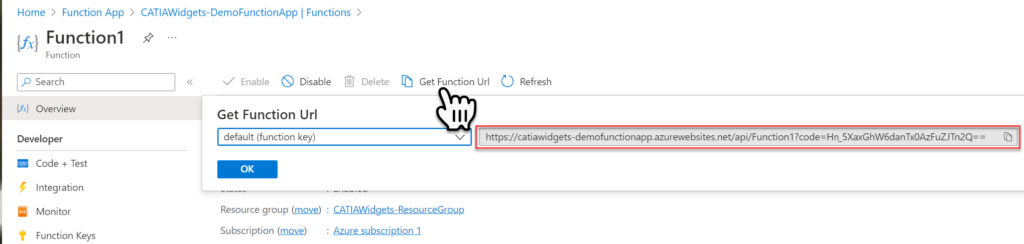
So we can see that our REST API is getting the secrets from the Key Vault., next well use these secrets to connect to a MySQL database.