
Table of Contents
Creating an Azure Function With Visual Studio
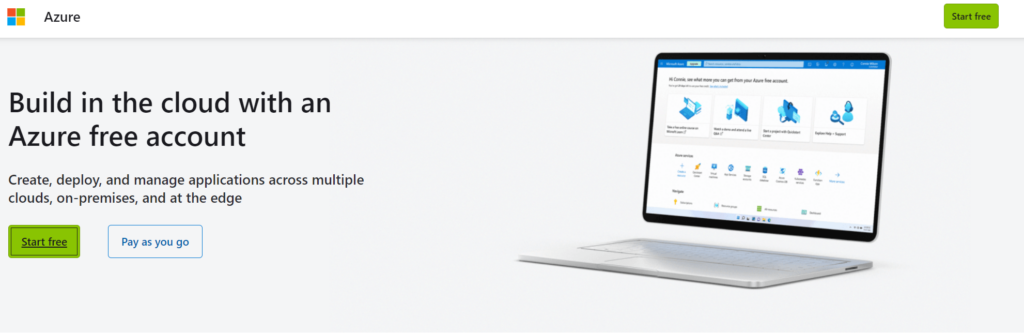
In a previous post we looked at how to create an AWS Lambda Function, I figure we should be fair and also look at the Microsoft Offerings as well. When you go to the Azure website you can Start For free with the following link.
You will need to sign up for an account.
You don’t need to know any C# for this post.
Once you have signed up with your Credit Card, go ahead and login.
Creating a Function
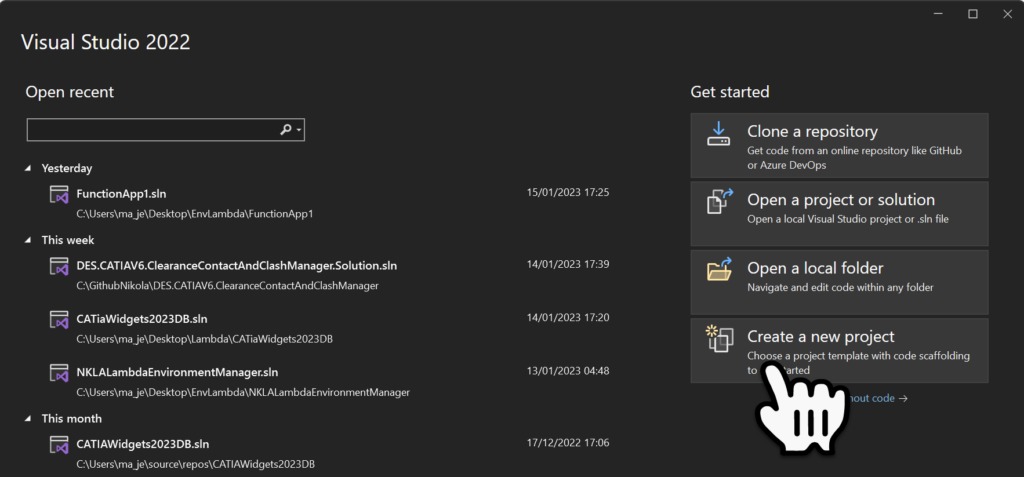
Now that you ahve an account we can open Visual Studio and create a new project with one of the Azure pre built templates.
New Visual Studio project
Once Visual Studio opens Select the Create a new Project menu item.
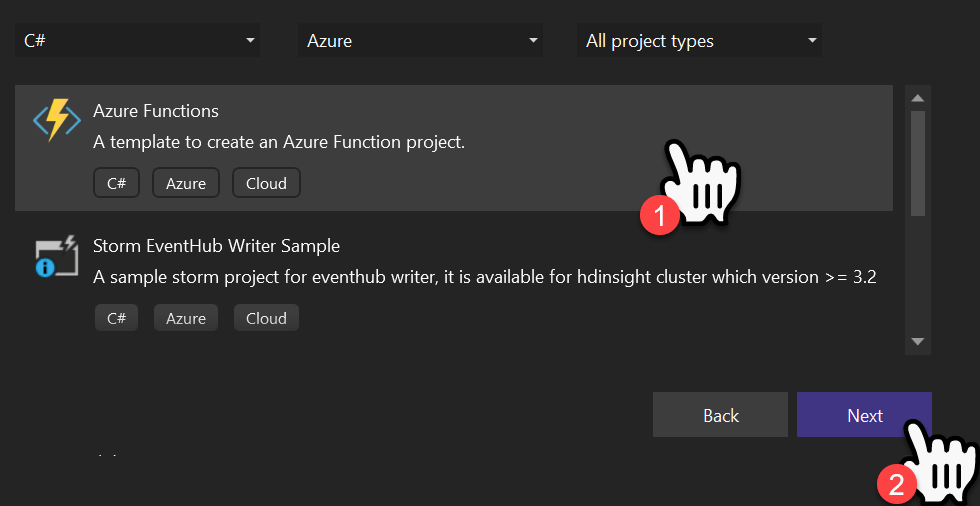
Set the Template Filter to C#, Azure, All Project Types.

Select the Azure Functions Template and then select Next.
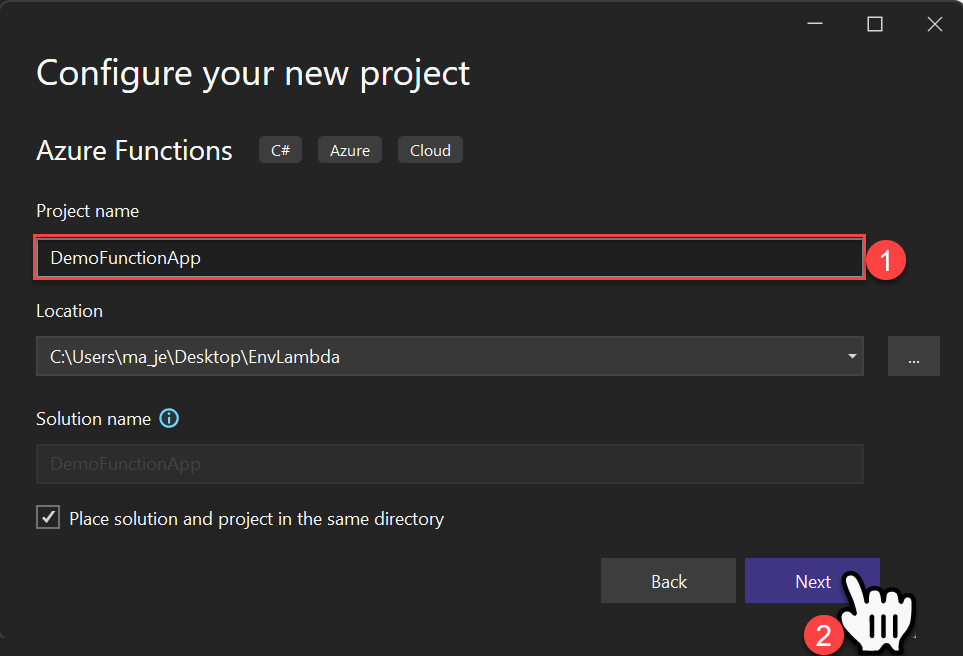
Within the Project Configuration page, define the Project Name and then select Next.
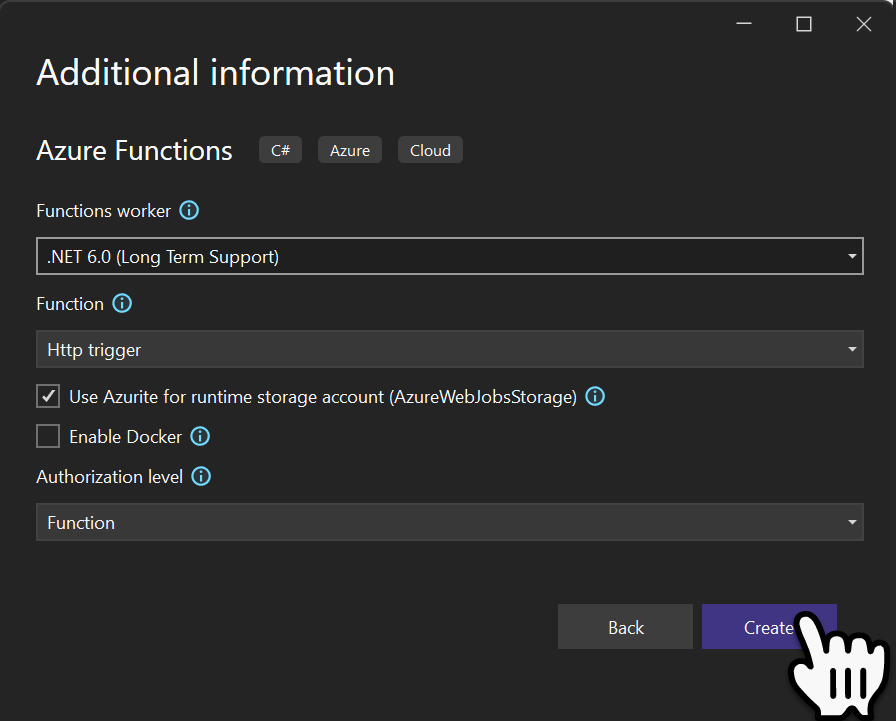
Select Create within the Additional Information page.
Make Sure its set to Http Trigger.
We will now have our first Function project with code defined. This is the boiler plate code, but that’s ok we will publish this to Azure and run it in the next steps.
using System;
using System.IO;
using System.Threading.Tasks;
using Microsoft.AspNetCore.Mvc;
using Microsoft.Azure.WebJobs;
using Microsoft.Azure.WebJobs.Extensions.Http;
using Microsoft.AspNetCore.Http;
using Microsoft.Extensions.Logging;
using Newtonsoft.Json;

namespace DemoFunctionApp
{
    public static class Function1
    {
        [FunctionName("Function1")]
        public static async Task<IActionResult> Run(
            [HttpTrigger(AuthorizationLevel.Function, "get", "post", Route = null)] HttpRequest req,
            ILogger log)
        {
            log.LogInformation("C# HTTP trigger function processed a request.");

            string name = req.Query["name"];

            string requestBody = await new StreamReader(req.Body).ReadToEndAsync();
            dynamic data = JsonConvert.DeserializeObject(requestBody);
            name = name ?? data?.name;

            string responseMessage = string.IsNullOrEmpty(name)
                ? "This HTTP triggered function executed successfully. Pass a name in the query string or in the request body for a personalized response."
                : $"Hello, {name}. This HTTP triggered function executed successfully.";

            return new OkObjectResult(responseMessage);
        }
    }
}
Defining the Publishing Strategy
A few times when, did this next step I found that the Azure connection got confused, ands some of the fields would not update or it just would not move to the next step and I had to futz with it. However the following steps are my core process.
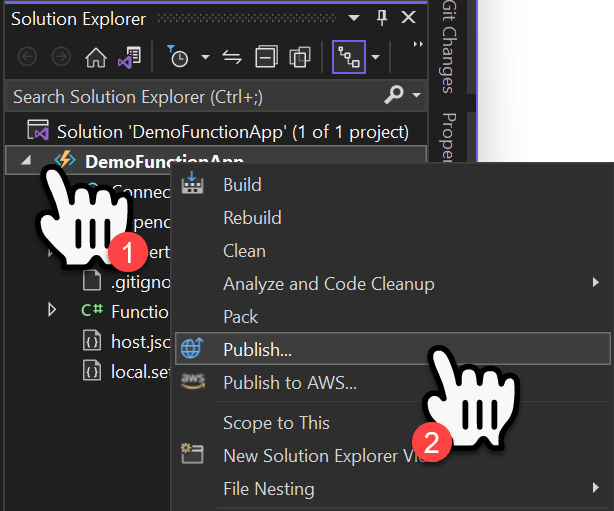
Within the Solution explorer, Right Mouse Click on the Function App and Select Publish from the Contextual Menu.
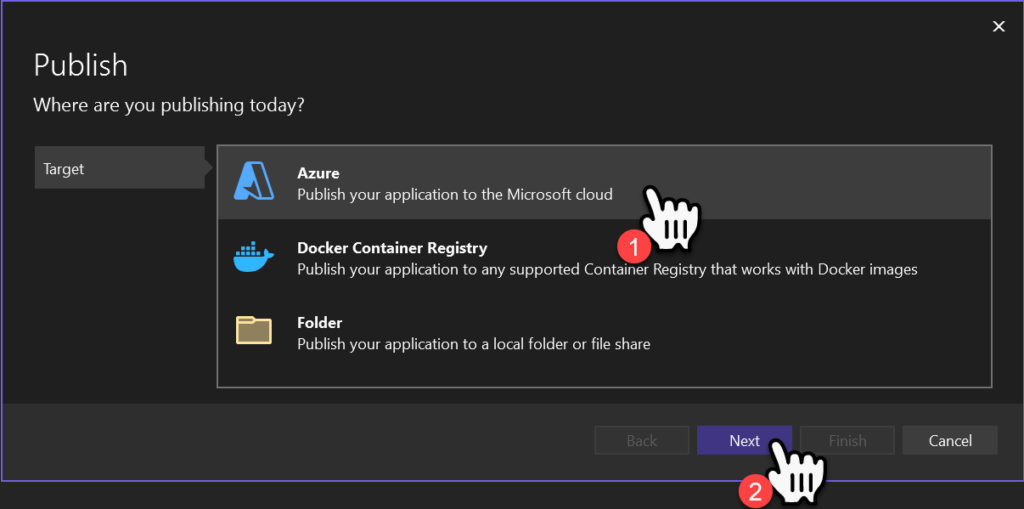
Within the Target page, Select Azure as the Publishing Destination, then Select Next.
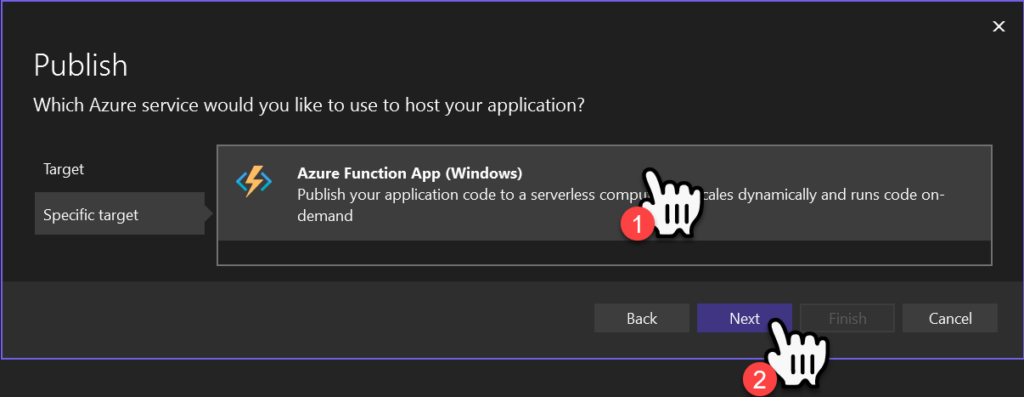
Within Specific Target page, Select the Windows Serverless Type and then Select Next.
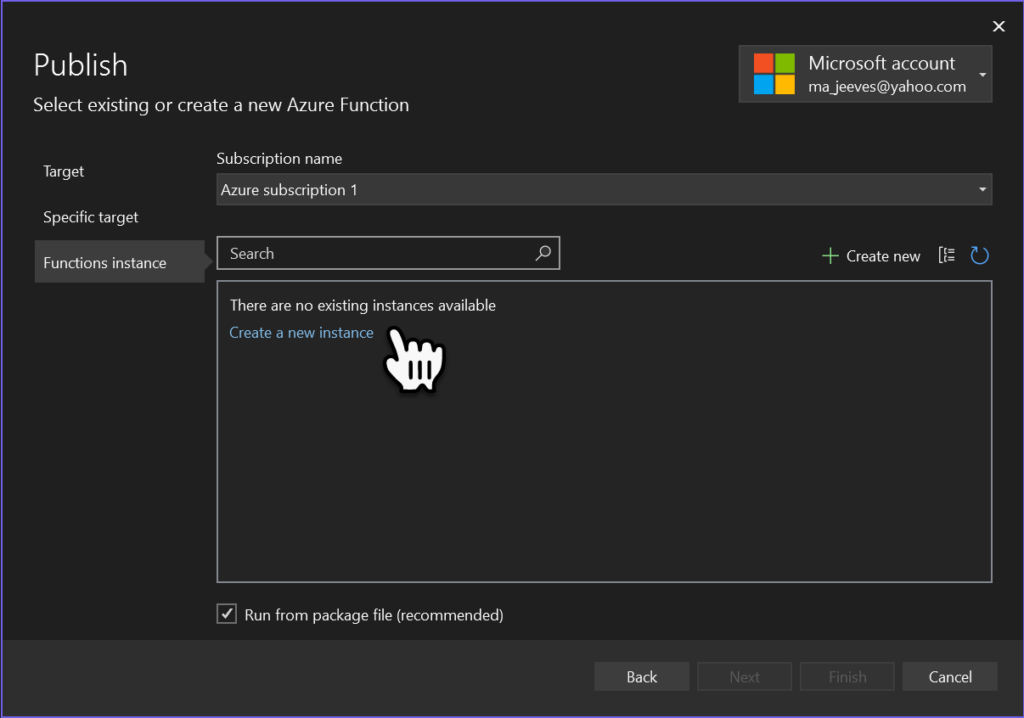
Within the Function Instance page, select the Create a New Instance, this is because we don’t have a serverless instance established as of yet.
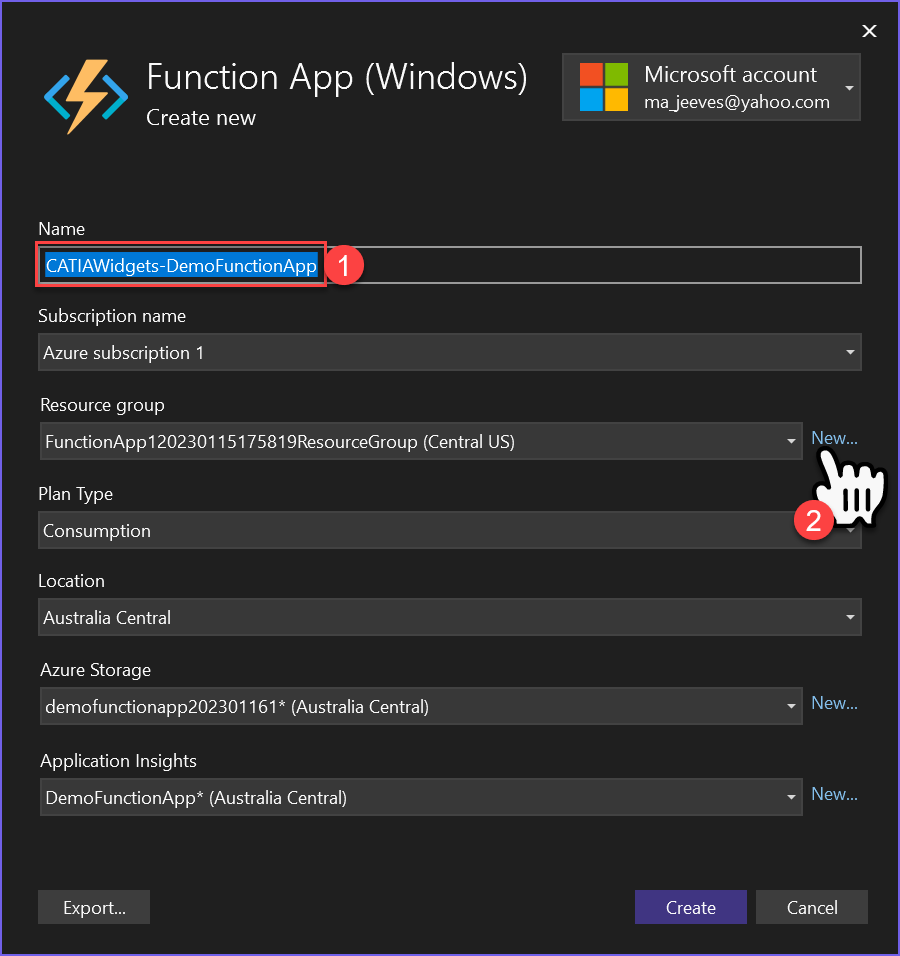
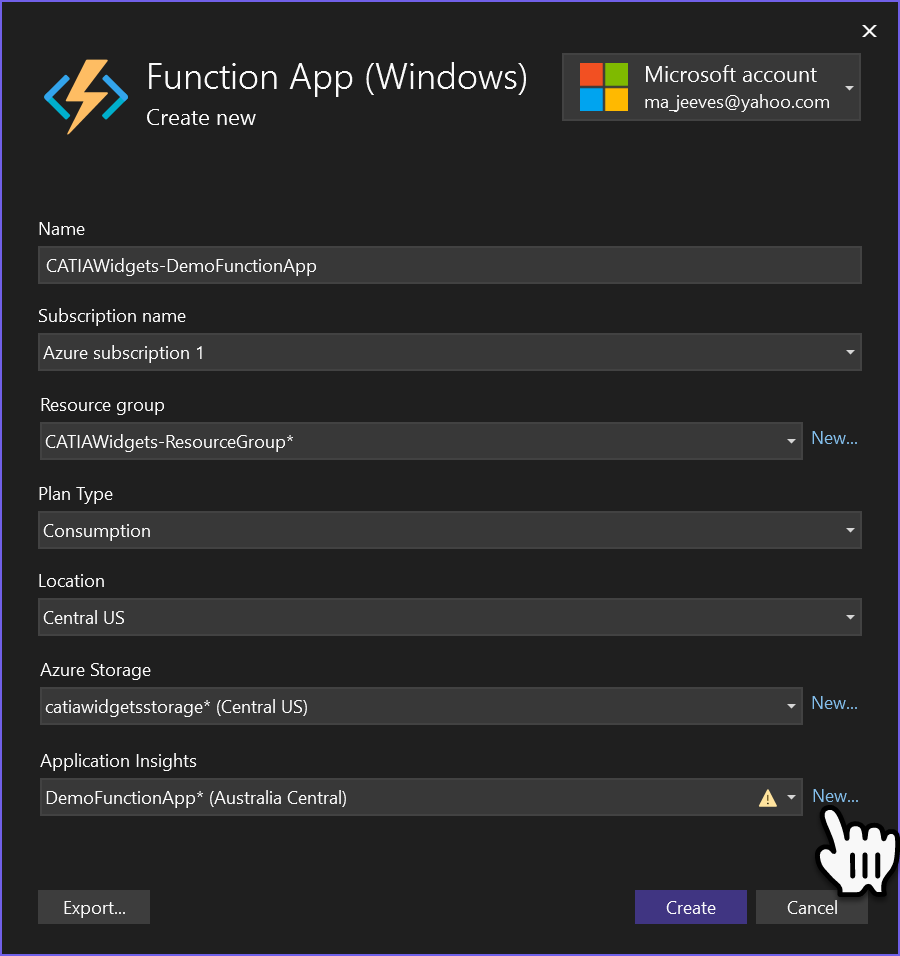
Within the Function App creation Dialogue window. key in a unique Name for the new Function app, then select New, for the Resource Group.
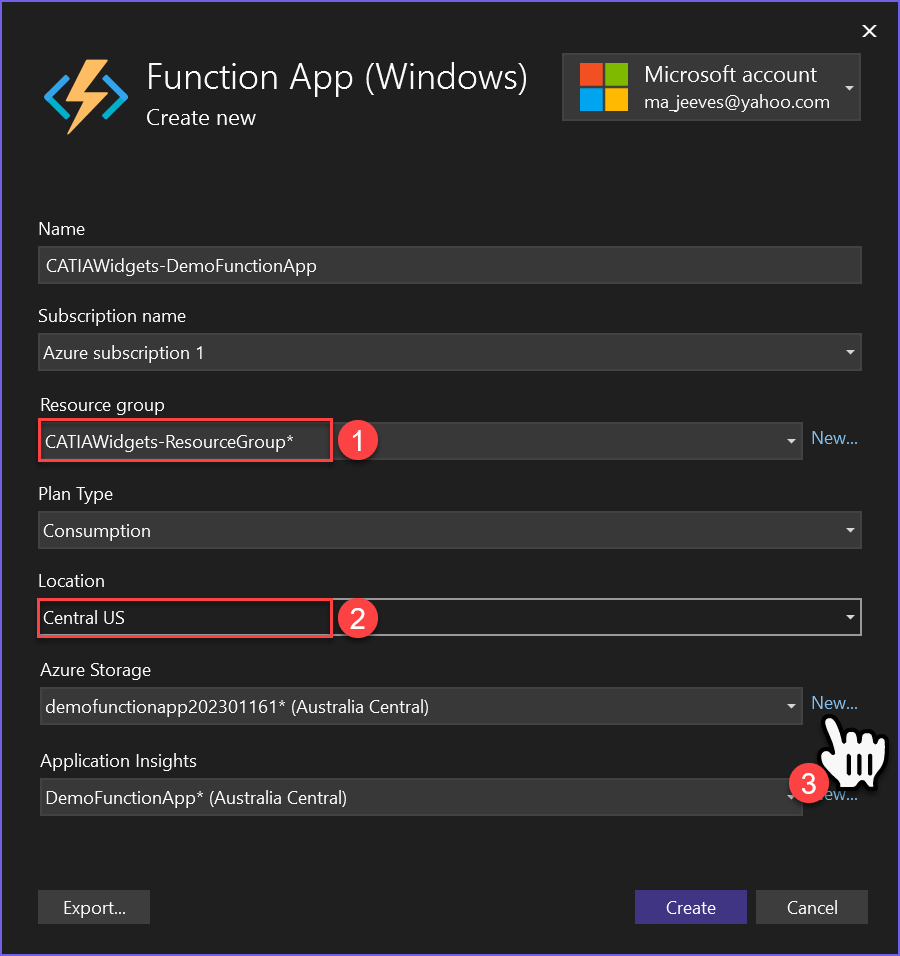
Define the new Resource Group and then Set the Location, then select New to create a new Azure Storage.
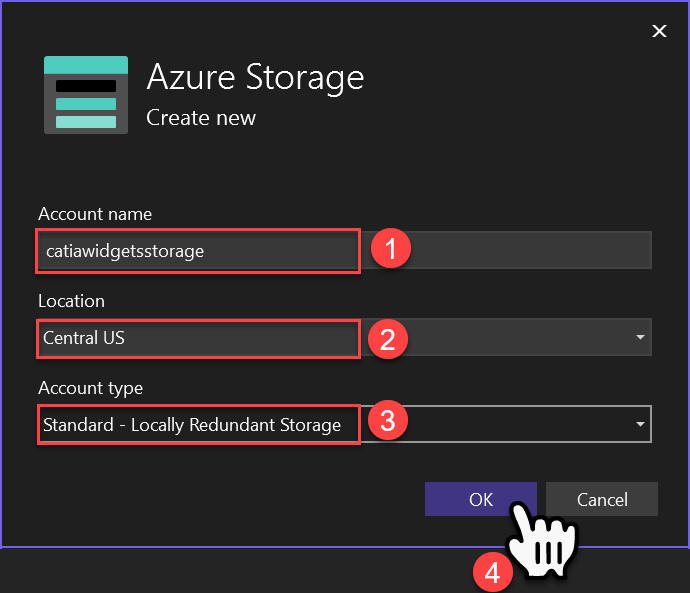
Define the Storage Account Name, Location and Account Type, then select Ok.
Select New, to create new Application Insights.
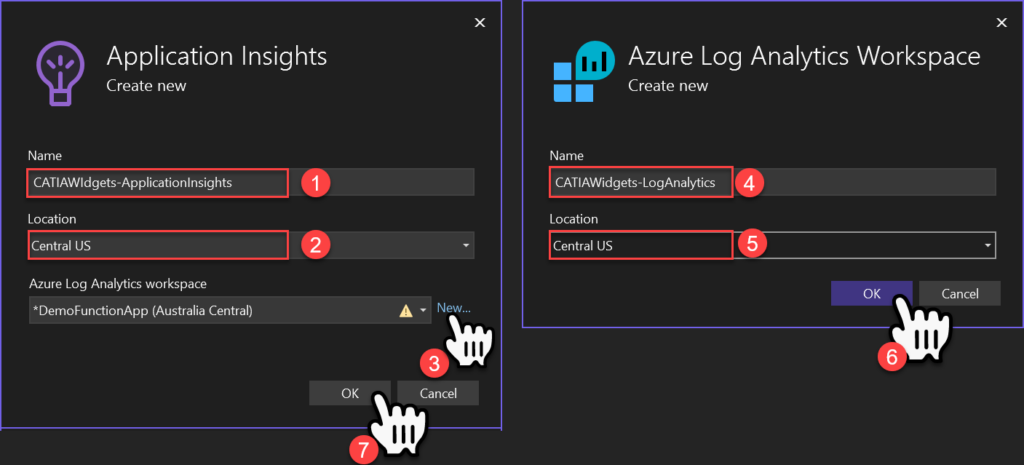
Within the Application Insights page define the Name, and Location then create a New Azure log Analytics Workspace. Within the Azure Log Analytics Workspace Page define the Name, and Location, then select Next. In the initial page select Ok
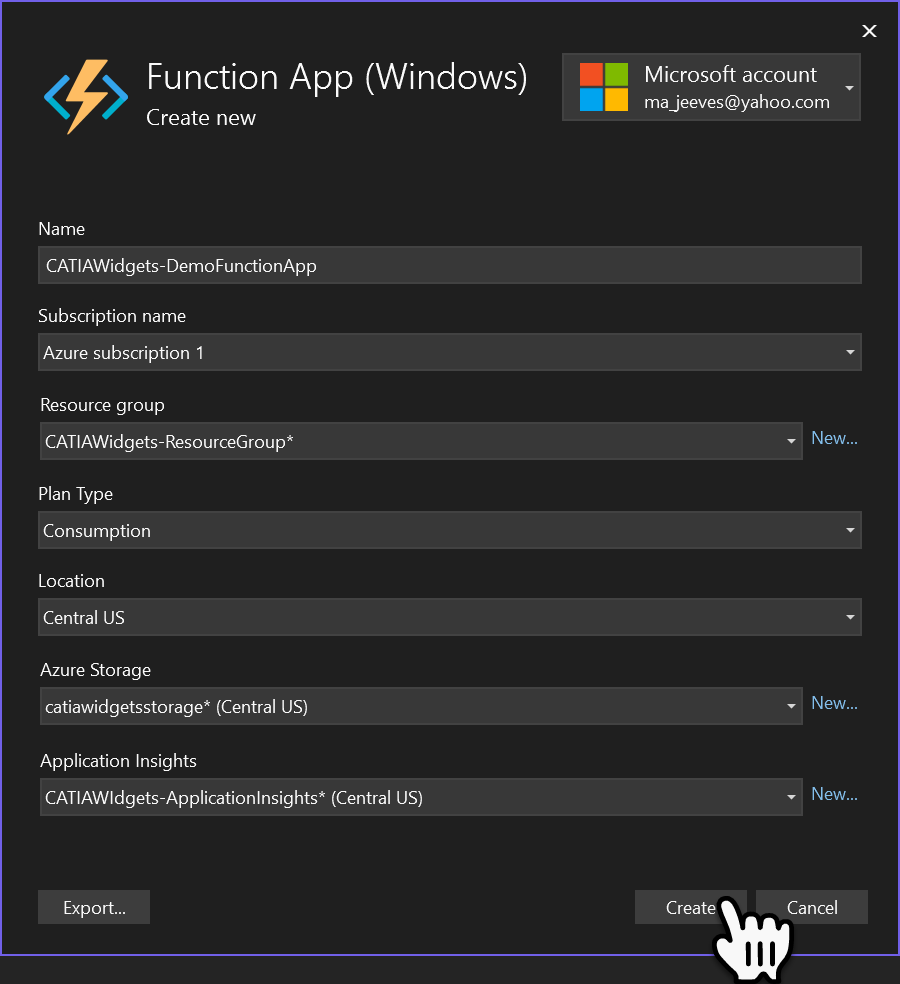
Finally select the Create Button. I notice some latency when defining some of the options you may have to make the selection more than once to refresh the page. When you do select Create it may take a few moments.
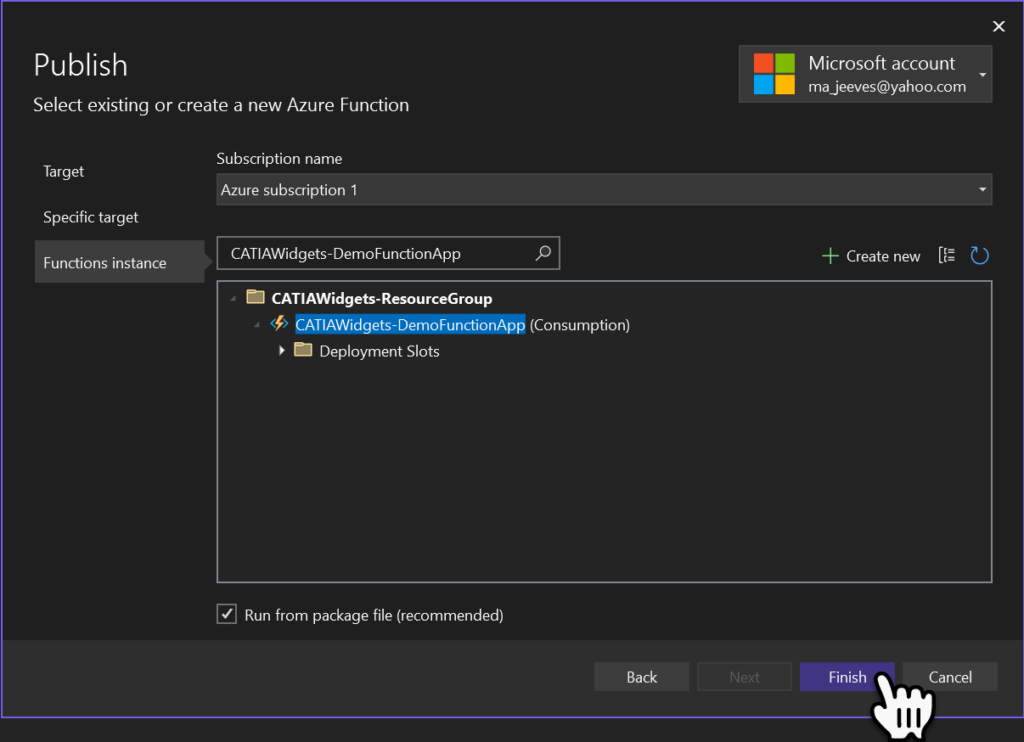
Once the Creation process has completed select Finish to finalize the Publishing method.
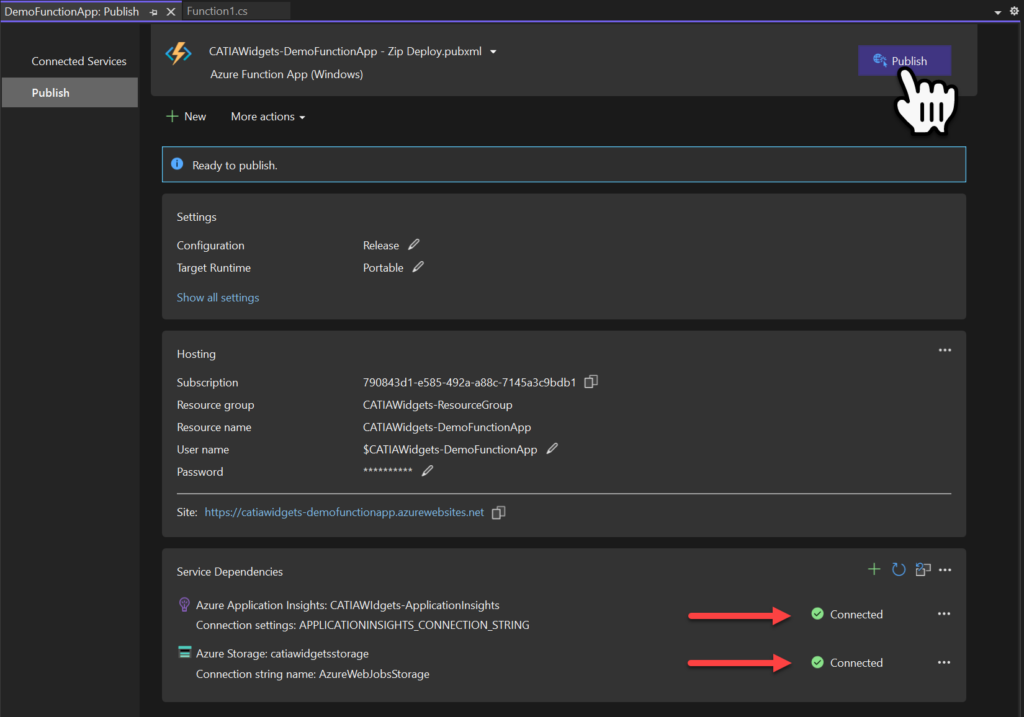
Publishing to Azure
Once the Publish method has completed you will now see that its connected to Azure, select Publish to push the code to Azure. once this is completed we can test the Function.
This can take a few moments to create all of the Azure objects, the first time. In subsequent publications were just updating existing objects ore reusing them so it will be much faster.
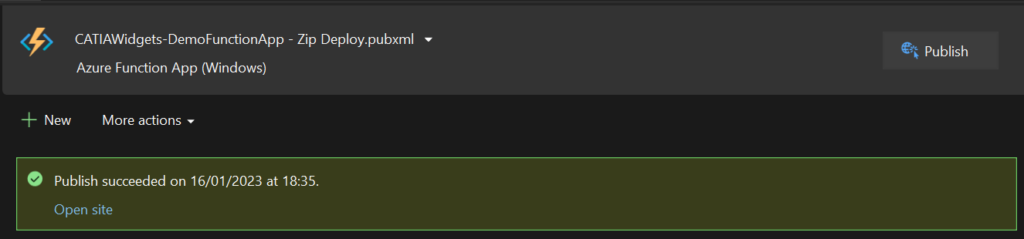
Once its completed you will see a Publication Succeeded message.
Testing the Function
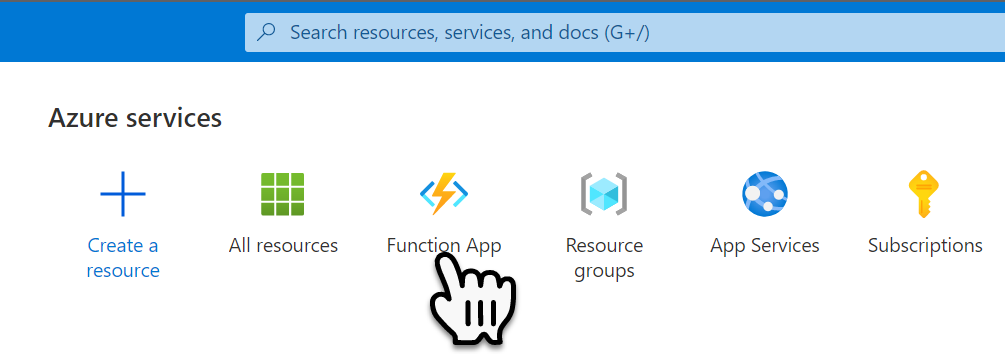
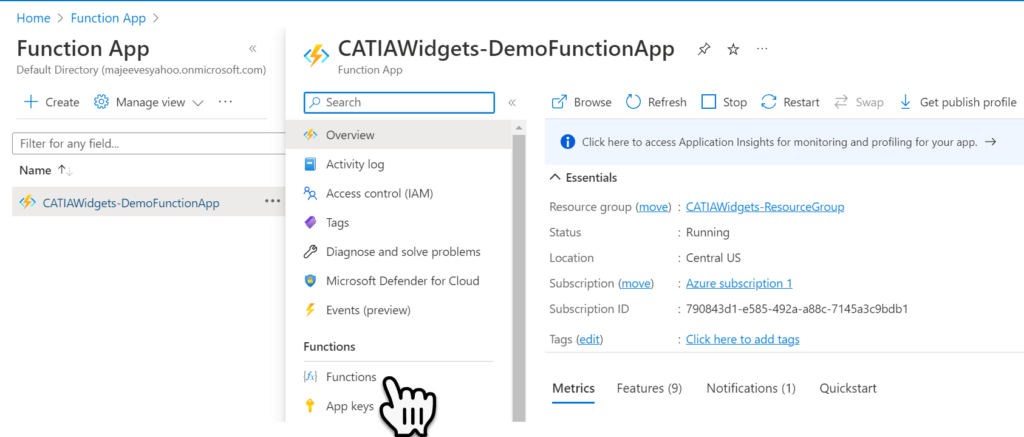
Were now going to test our Function to do so, within the Azure Services Page select the Function App Service,
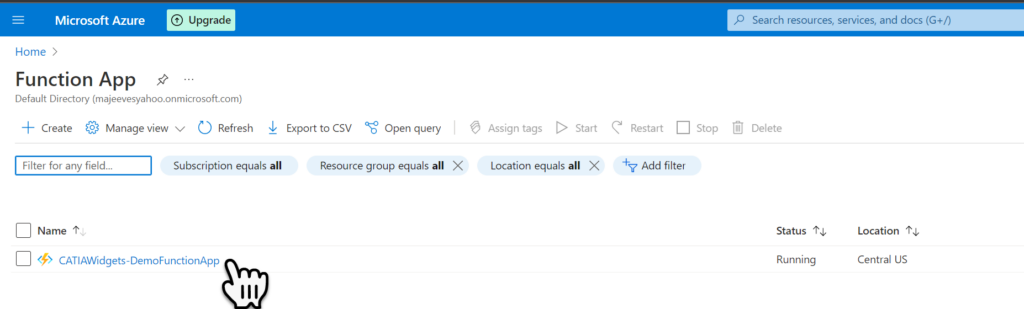
Within the Function App page select the new Function we just created.
There is tones of great information this page, but for now we will just navigate to the Functions menu option.
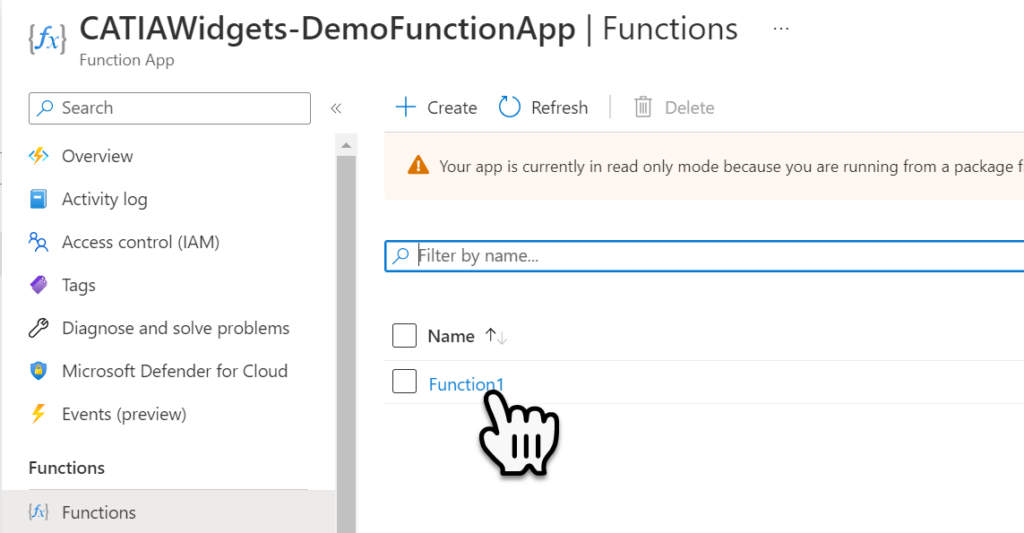
There maybe multiple functions published within a single function app, in our case we only have one and its called Function1, select the function.
Once this page fully loads, select the Get Function URL menu item.
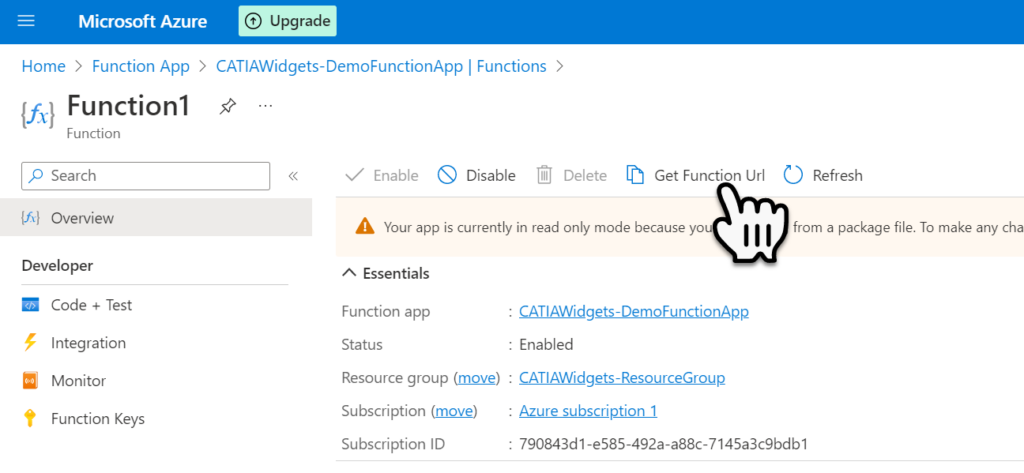
When the URL is displayed Select the Copy Icon to copy the URL to the clipboard, then open a new Chrome, or other browser tab.

When we paste this URL into a new browser tab we can see that we get the response back from the code within the function.

If we pass in the Name attribute and Value then wee will get the correct response instead of the default one.

In the next post we will look at how we can use Azure Key Vault to Store Secrets, that we use to connect to an Azure MySQL database.