So I had a little guidance from a person friend, great developer and awesome software architect Derek Diebold on this one since GitHub has recently changed their process a little.
So the aim of this Blog, is to show you how to setup visual studio with GitHub and NuGet so you see your GitHub packages with the Visual Studio NuGet Package Manager, we will also create a basic Visual Studio Project and then build a GitHub Package and finally in a separate Visual Studio Project we’ll reference our GitHub Package using the NuGet package Manager.
So Let’s Get Started.
Table of Contents
Connecting GitHub to Visual Studio NuGet Package manager
To allow Visual Studio NuGet Package Manager NPM the authority to read the packages in GitHub we must create a Personal Access Token and then run a NuGet application using this information to allow NPM access into our GitHub account.
GitHub Personal Access Token
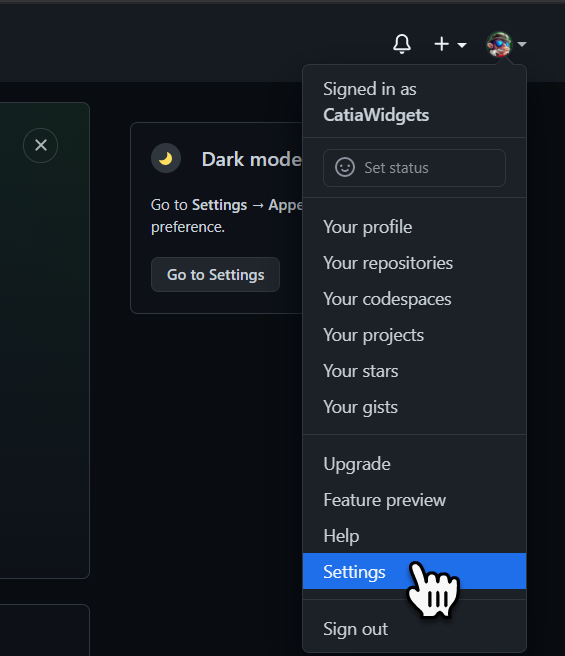
The first thing we need to do, is create an GitHub Personal Access Token, to do this login to your GitHub account and select the dropdown menu in the upper Right-hand corner. From the dropdown menu select Settings.
The scroll down and select Developer Settings
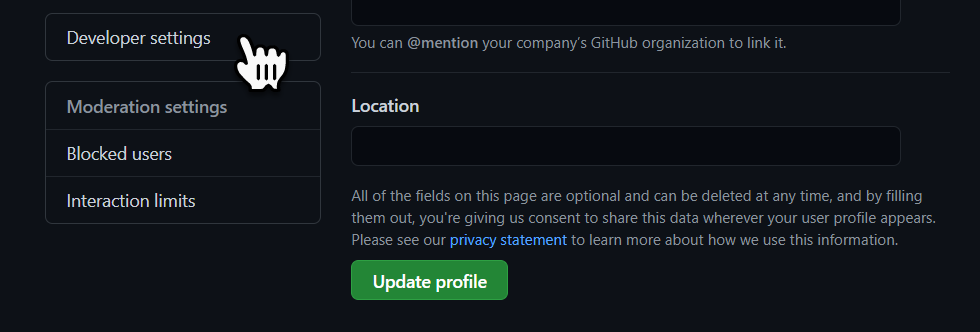
Select Personal Access Tokens, and then select Generate New Token

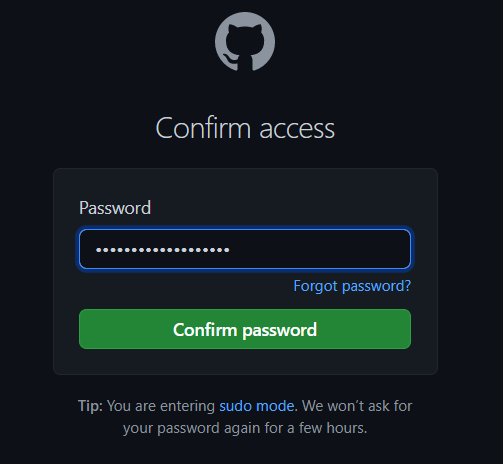
You will be asked to login to GitHub again, go ahead and enter your password.
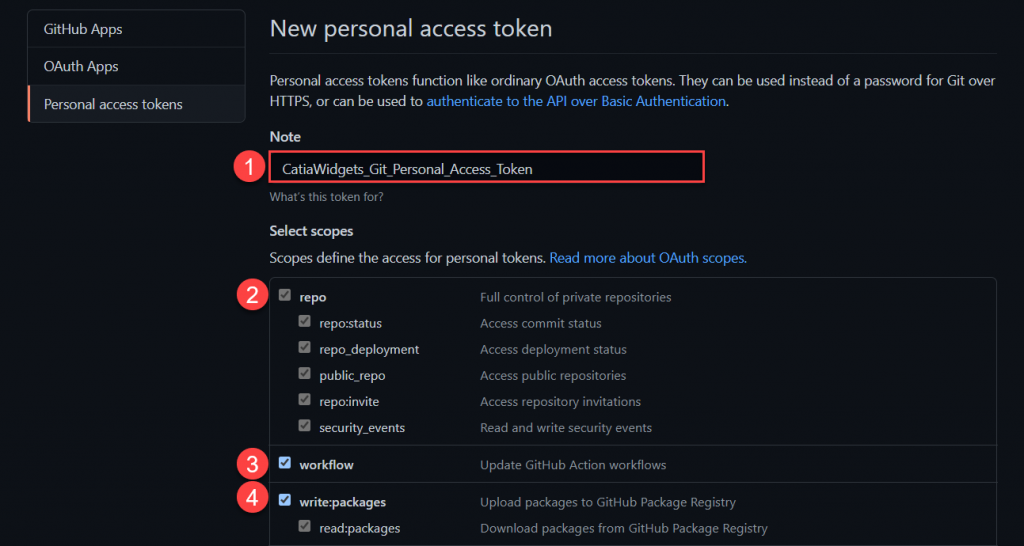
First we will give the Personal Access Token a Name / Note, then well check; Repo, Workflow, and Write:packages
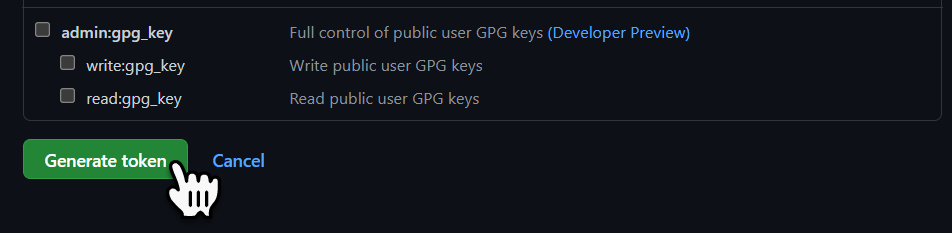
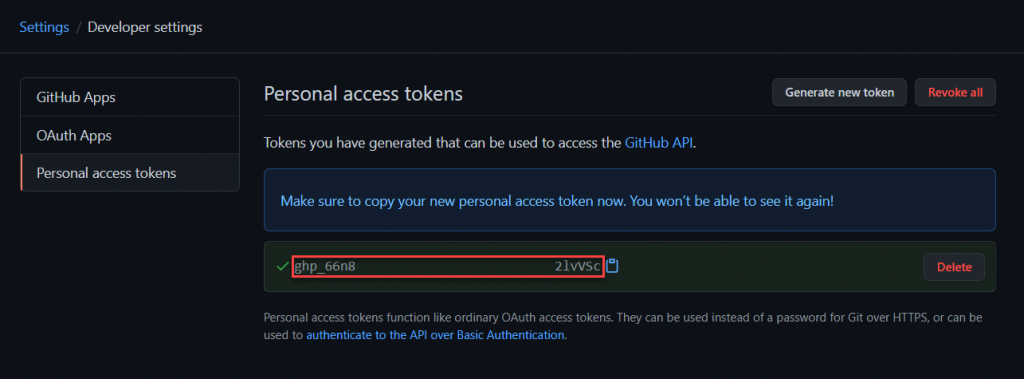
Then scroll down to the bottom and select Generate Token, note that on the next page you will be shown the new token and this is only visible once, so make sure you make a copy of it.
Make sure you copy the Personal Access Token.
NuGet Executable
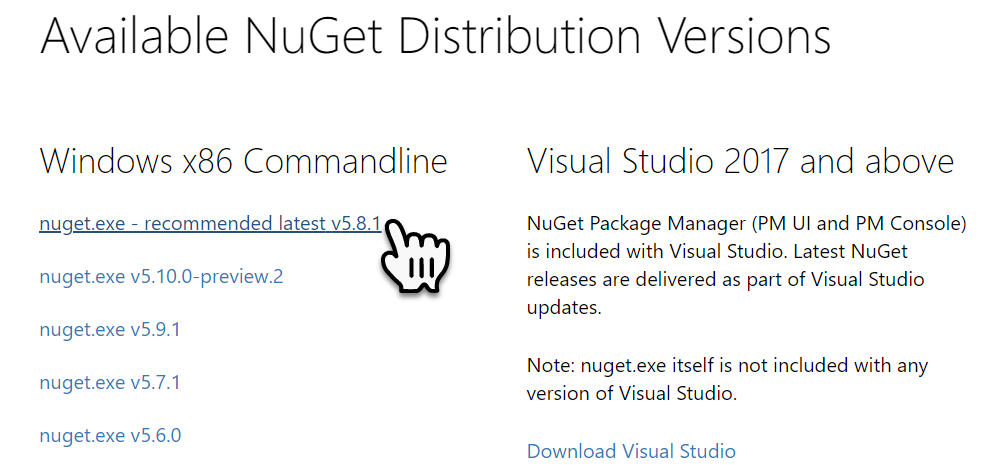
The next thing we want to do is download the NuGet.exe application, to do this go to the following link NuGet Downloads and download the latest recommended version.
Once you have downloaded the application, create a folder on the C:\ Drive and place the downloaded application within it.

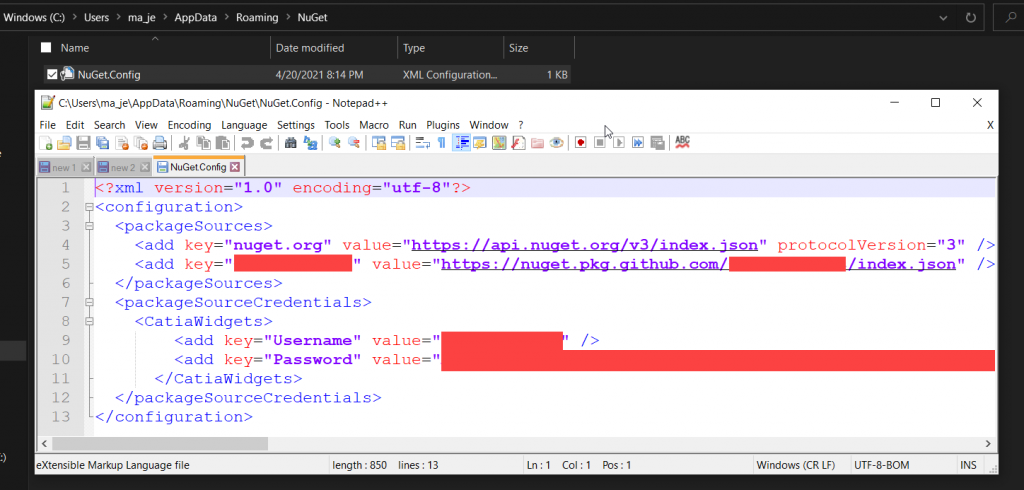
So in a Command Window change directory to C:\NuGetApplication (or what ever you named the folder) and then key in the following command, where name is the name of the NuGet Repository, source is a standard URL where the OWNER is the name of the user or organization account that owns the repository containing your project, username is your GitHub username, and the password is the GitHub User Access Token previously generated.
C:\NuGetApplication>nuget sources add
-name NAME
-source  https://nuget.pkg.github.com/OWNER/index.json
-username USERNAME
-password ghp_66n8OmxxxxxxxxxxxlvVSc
When this command is executed, you should get a message saying that the Package Source With Name <Name> was Added Successfully.

You will also get a NuGet.Config file created in your user path/AddData/Roaming/NuGet folder.
Visual Studio NPM
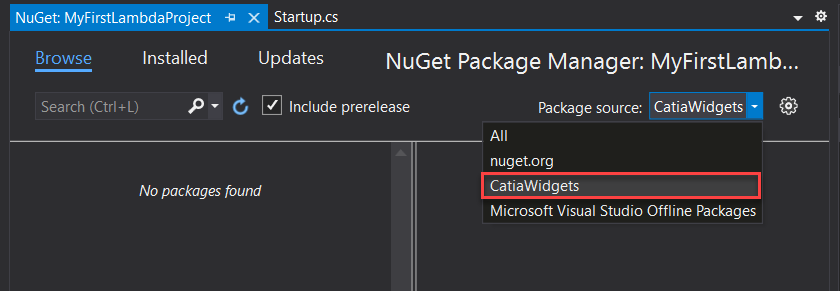
Now we have done all this we can open a Visual Studio Project and navigate to the NPM. Within the dialogue window select the Package Source dropdown, we can now see the new Package Source we created.
Creating Our First GitHub Package
What were going to do is create a simple Visual Studio Project that contains Model definitions and interfaces, and then create a GitHub package with this content.
GitHub Repository
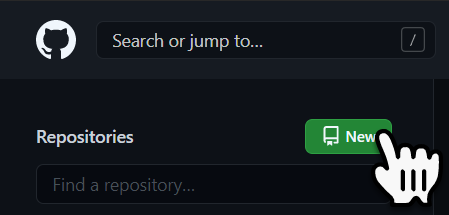
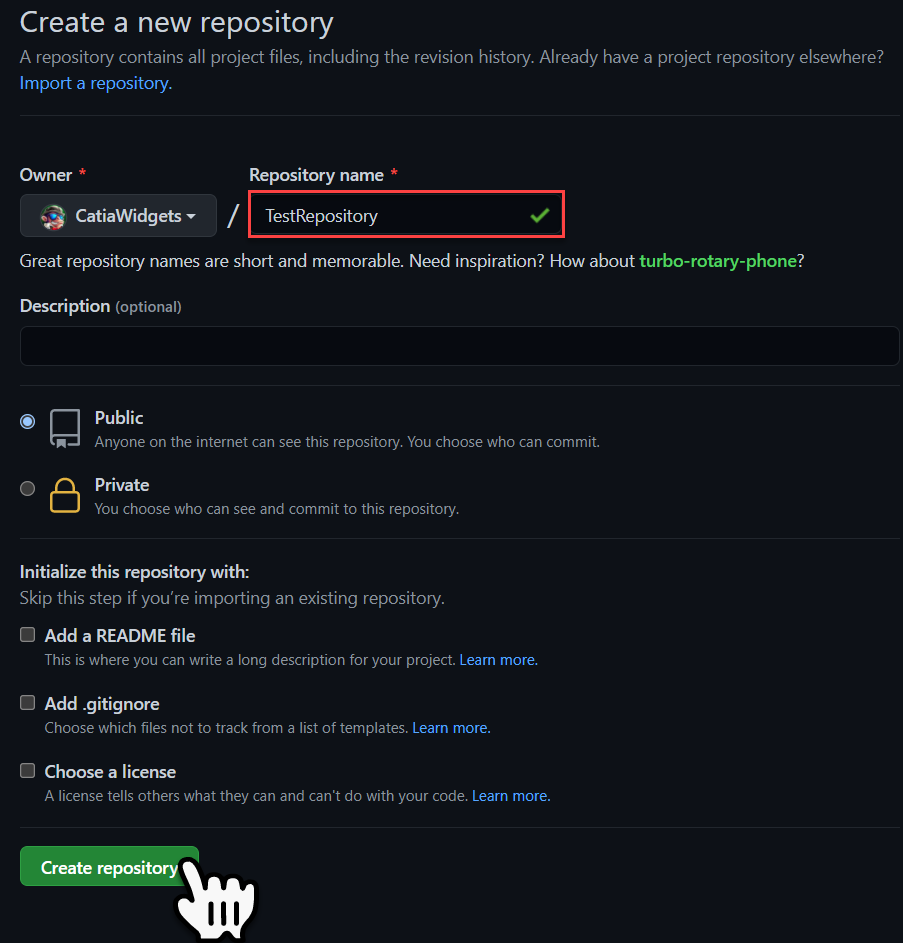
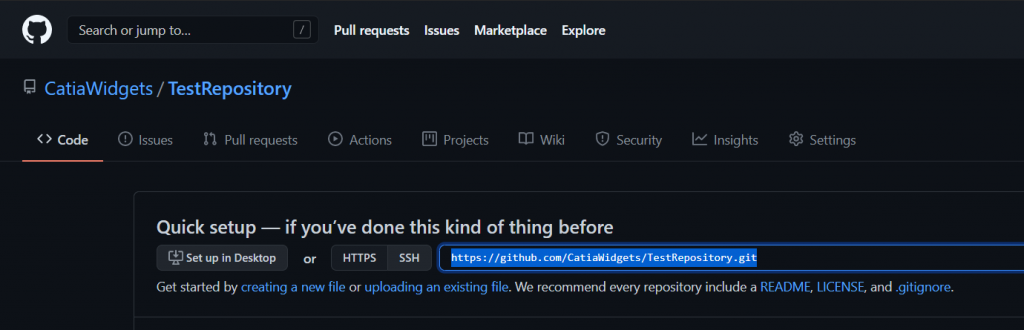
Within GitHub select New in the upper left-hind corner to create a New Repository
We will assign a Repository Name, and then select Create Repository at the bottom of the page.
Once the Repository is created the repository URL will be displayed, its not necessary to copy it but you can if you want.
Visual Studio Project
Cloning the Repository
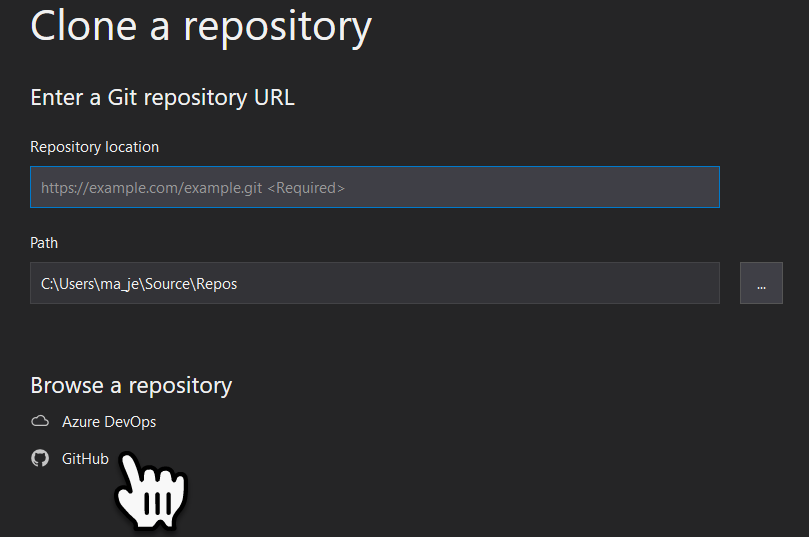
Let’s start Visual Studio and on the first page select Clone a Repository.

Within the Clone a Repository page select the GitHub link to browse the repository’s in GitHub
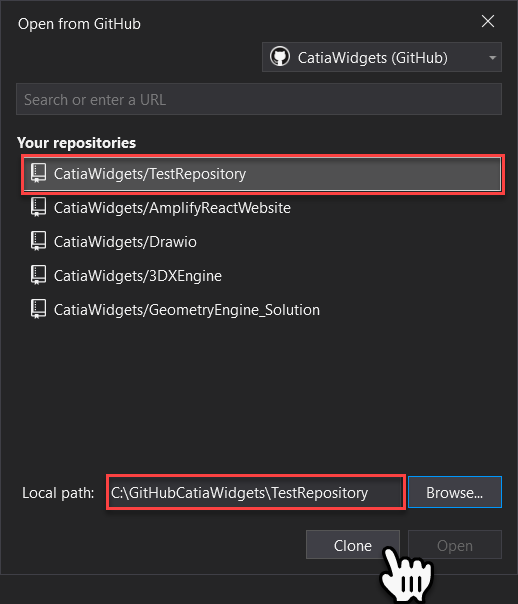
In the Open from GitHub dialogue window select the new Repository, then define the Local Path and select Clone.
Creating the Solution
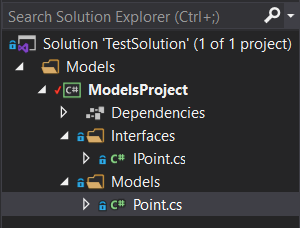
We are going to keep the solution really simple a .NET Core 3.1 Class Project one Interface and a Class Implementing the Interface.
namespace ModelsProject.Interfaces
{
    public interface IPoint
    {
        double X { get; set; }
        double Y { get; set; }
        double Z { get; set; }
    }
}
using ModelsProject.Interfaces;
namespace ModelsProject.Models
{
public class Point : IPoint
{
public double X { get; set; } = 0;
public double Y { get; set; } = 0;
public double Z { get; set; } = 0;
public Point() { }
public Point(Point iPoint)
{
this.X = iPoint.X;
this.Y = iPoint.Y;
this.Z = iPoint.Z;
}
public Point(double iX, double iY, double iZ)
{
this.X = iX;
this.Y = iY;
this.Z = iZ;
}
}
}Deployed NuGet GitHub Package
Packaging the NuGet Package
Before we can do the Packaging we ahve to add some attributes to the .csproj file of the project we want to package. These are ; OutputType, PackageId, version, Authors, Company, PackageDescription, and repositoryUrl.
<Project Sdk="Microsoft.NET.Sdk">

  <PropertyGroup>
    <TargetFramework>netcoreapp3.1</TargetFramework>

    <OutputType>library</OutputType>
    <PackageId>CatiaWidgets.TestPackage</PackageId>
    <Version>1.0.0</Version>
    <Authors>CatiaWidgets</Authors>
    <Company>CatiaWidgets</Company>
    <PackageDescription>This DLL is a Test Dll.</PackageDescription>
    <RepositoryUrl>https://github.com/CatiaWidgets/TestRepository</RepositoryUrl>
  </PropertyGroup>

</Project>
The ‘Output Type’ is the type of package being created in this case it’s a library. The ‘Package ID’ will be the name of the package displayed in the NuGet its best practice to keep this the same as the Project Name. The ‘Version’ is a rolling version number and must be manually incremented prior to packaging the project. ‘Authors’ who wrote it, ‘Company’ is the company who created it, and ‘Package Description’ a brief description of what the package contains. Finally the ‘Repository URL’ is the GitHub repository URL without the ‘.git’ extension.
Once you ahve made these changes make sure that the project still builds.
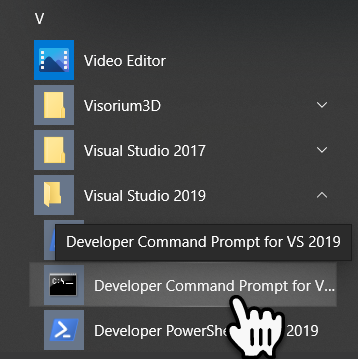
Next we need to open a Visual Studio Developer Prompt, this can be found in the Windows Start menu under the Visual Studio Folder.
Now we have the Visual Studio developer prompt we must navigate to the solution and then package the project.

First thing we need to do is change directory to where our solution is.
C:\GitHubCatiaWidgets\TestRepository\TestSolution>dir
 Volume in drive C is Windows
 Volume Serial Number is 9451-8776

 Directory of C:\GitHubCatiaWidgets\TestRepository\TestSolution

04/21/2021  09:24 AM    <DIR>          .
04/21/2021  09:24 AM    <DIR>          ..
04/21/2021  09:07 AM    <DIR>          ModelsProject
04/21/2021  09:07 AM             1,419 TestSolution.sln
               1 File(s)          1,419 bytes
               3 Dir(s)  290,883,883,008 bytes free
Next we will run the ‘dotnet pack –configuration Release’ command this will create the package
C:\GitHubCatiaWidgets\TestRepository\TestSolution>dotnet pack --configuration Release
Microsoft (R) Build Engine version 16.8.3+39993bd9d for .NET
Copyright (C) Microsoft Corporation. All rights reserved.

  Determining projects to restore...
  All projects are up-to-date for restore.
  ModelsProject -> C:\GitHubCatiaWidgets\TestRepository\TestSolution\ModelsProject\bin\Release\netcoreapp3.1\ModelsProject.dll
  Successfully created package 'C:\GitHubCatiaWidgets\TestRepository\TestSolution\ModelsProject\bin\Release\CatiaWidgets.TestPackage.1.0.0.nupkg'.
Pushing the NuGet Package
Now we have a NuGet Package we need to push it to NuGet this is done by the running the ‘dotnet nuget push’ command with path of the previously built package path and a ‘–source’ option defining the name of the NuGet Package Source.
C:\GitHubCatiaWidgets\TestRepository\TestSolution>dotnet nuget push C:\GitHubCatiaWidgets\TestRepository\TestSolution\ModelsProject\bin\Release\CatiaWidgets.TestPackage.1.0.0.nupkg --source CatiaWidgets
warn : No API Key was provided and no API Key could be found for 'https://nuget.pkg.github.com/CatiaWidgets'. To save an API Key for a source use the 'setApiKey' command.
Pushing CatiaWidgets.TestPackage.1.0.0.nupkg to 'https://nuget.pkg.github.com/CatiaWidgets'...
  PUT https://nuget.pkg.github.com/CatiaWidgets/
warn : Please use the --api-key option when publishing to GitHub Packages
  OK https://nuget.pkg.github.com/CatiaWidgets/ 1057ms
Your package was pushed.
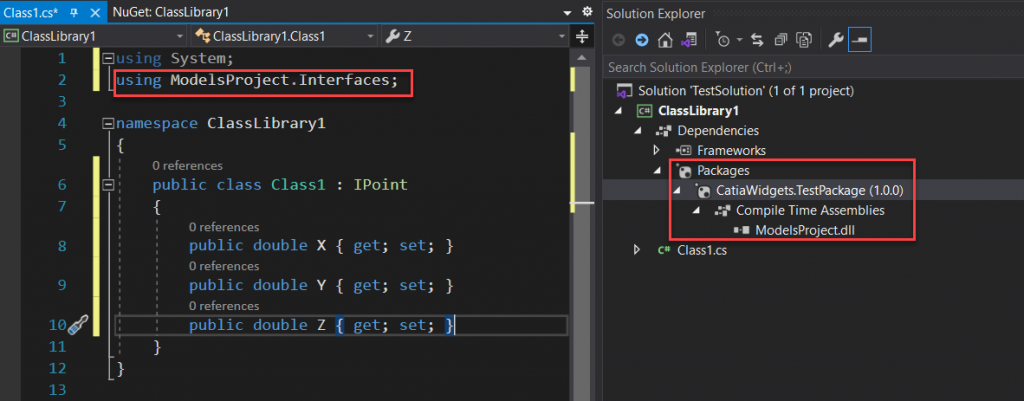
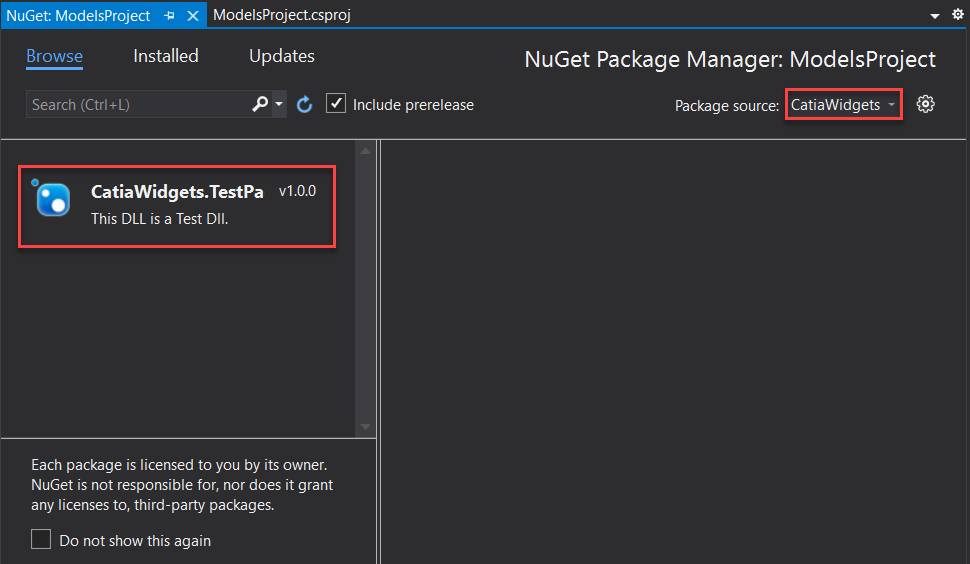
If we go back to Visual Studio and open the NuGet Package Manager and change the Package Source to CatiaWidgets we can now see our new Test Package.
Referencing Our first GitHub Package With Visual Studio NPM
If we now create a new Visual Studio Project we can add a NuGet reference to our package using the NuGet Package Manager. In the example below we can see that the Dependency has been added and the Interface from our dependency implemented on the class.