
Table of Contents
Dealing With CORS
What is CORS
Let’s start, what is CORS. and why do I care. Quick over view before we get into the details of how to deal with it. CORS stands for Cross Origin Resource Sharing. (CORS) is an HTTP-header based mechanism that allows a server to indicate any other origins (domain, scheme, or port) than its own from which a browser should permit loading of resources. CORS also relies on a mechanism by which browsers make a “preflight” request to the server hosting the cross-origin resource, in order to check that the server will permit the actual request. In that preflight, the browser sends headers that indicate the HTTP method and headers that will be used in the actual request.
Without making these changes this is the error you will see within the Developer Console in a browser when trying to access the API end points with the react application were going to write. In this case the end point was being called from the developers laptop where they were developing locally.
Essentially your a weapons grade plutonium manufacturer in the US. and have a license to sell outside of the US. When China makes a request for 2Kg’s of plutonium you validate your ability to sell your plutonium by looking at your license and fortunately the license says ‘*’ meaning that it doesn’t matter what country wants to purchase your plutonium your allowed to sell it, probably not a great idea in the current climate. So you talk to the US. government and restrict the ability to sell the plutonium to anybody down to a few trusted country’s. This is also true of CORS we don’t want any Origin to be able to make data requests, so what well do once we have it working well restrict the CORS origin down to a specific set of Origins.
In our case we want to create a React webpage that can display the data in our RDS MySQL database. The Amplify web address is ‘https://main.d3bamXXXXXX.amplifyapp.com/’ and this web page want to make a request from ‘https://YYYYYYYYY.execute-api.eu-west-1.amazonaws.com/Prod/v1/DataModel’. Since both URL’s are completely different the Resources being Shared or data being request is being made Cross Origins. If we allows CORS requests from anywhere ‘*’ we don’t know who is making that request and for what reason so we want to only accept CORS requests from ‘https://main.d3bamXXXXXX.amplifyapp.com/’ our Amplify website.
So how do we implement any of this?
Lambda Code Changes
The first change we need to make is in the Lambda project, specifically within the Startup.cs file. According to Microsoft https://docs.microsoft.com/en-us/aspnet/core/security/cors?view=aspnetcore-5.0 there are a few things we have to do. Caution ensure that the CORS pieces are in the same sequence as shown below during my testing I found that certain things have to be executed in a specific sequence.
First we set the policy name _myAllowSpecificOrigins, the policy name is arbitrary.
readonly string MyAllowSpecificOrigins = "_myAllowSpecificOrigins";
Within the ConfigureServices method, the AddCors method call adds CORS services to the app’s service container. This is where we would define specific URL paths, but for now we will just use ‘*‘.
				services.AddCors(options =>
                 {
                   options.AddPolicy(
                     name: MyAllowSpecificOrigins,
                     builder =>
                     {
                       builder.WithOrigins("*");
                     });
                 });
Finally, we tell the app to use CORS and then enable the _myAllowSpecificOrigins CORS policy for all controller endpoints.
			app.UseCors();

            app.UseAuthorization(); //Not used for CORS, but is still required.

            app.UseEndpoints(endpoints =>
            {
                endpoints.MapControllers().RequireCors(MyAllowSpecificOrigins);
            });
Full Code.
using Microsoft.AspNetCore.Builder;
using Microsoft.AspNetCore.Hosting;

using Microsoft.Extensions.Configuration;
using Microsoft.Extensions.DependencyInjection;
using Microsoft.Extensions.Hosting;

using MyFirstLambdaProject.Processors;

using Serilog;

namespace MyFirstLambdaProject
{
    public class Startup
    {
        readonly string MyAllowSpecificOrigins = "_myAllowSpecificOrigins";

        public const string AppS3BucketKey = "AppS3Bucket";

        public Startup(IConfiguration configuration)
        {
            Configuration = configuration;

            Log.Logger = new LoggerConfiguration()
                            .Enrich.FromLogContext()
                            .MinimumLevel.Information()
                            .WriteTo.Console()
                            .CreateLogger();
        }

        public static IConfiguration Configuration { get; private set; }

        public void ConfigureServices(IServiceCollection services)
        {
            services.AddCors(options =>
            {
                options.AddPolicy(
                    name: MyAllowSpecificOrigins,
                    builder =>
                    {
                        builder.WithOrigins("*");
                    });
            });
            services.AddControllers();

            services.AddSingleton<IDataModelProcessor, DataModelProcessor>();
        }

        public void Configure(IApplicationBuilder app, IWebHostEnvironment env)
        {
            if (env.IsDevelopment())
            {
                app.UseDeveloperExceptionPage();
            }

            app.UseHttpsRedirection();

            app.UseRouting();

            app.UseCors();

            app.UseAuthorization();

            app.UseEndpoints(endpoints =>
            {
                endpoints.MapControllers().RequireCors(MyAllowSpecificOrigins);
            });
        }
    }
}
API Gateway Changes
Next well do the some what painful changes in the API Gateway, so go ahead and log into the AWS Console and navigate to the API Gateway.
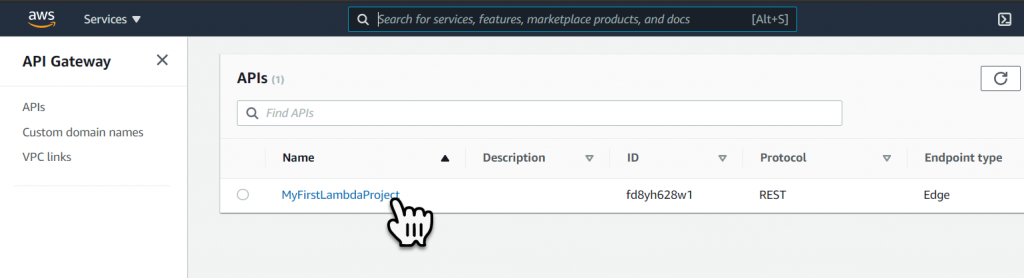
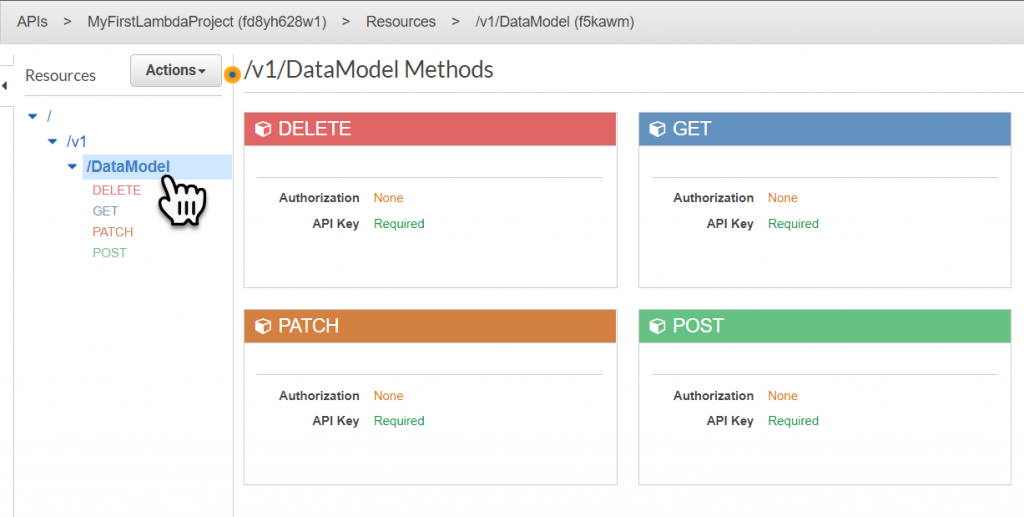
Within the API Gateway console select the Lambda Project.
Adding Method Response 200
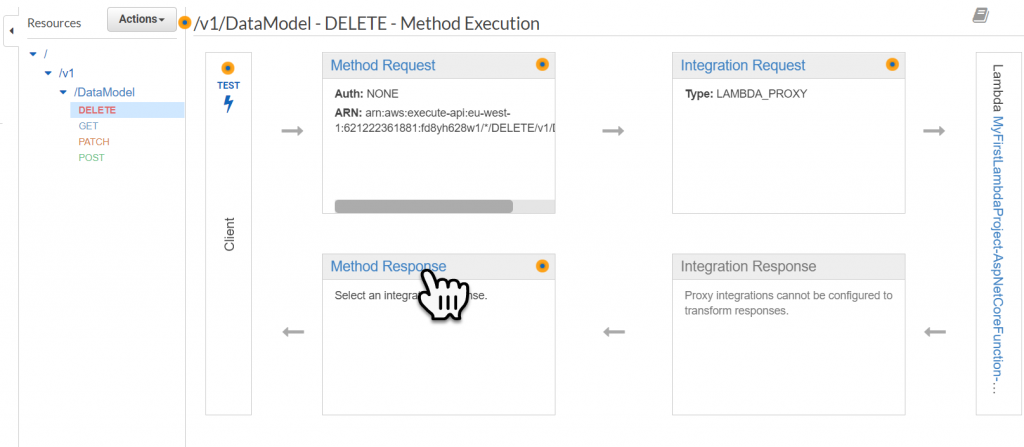
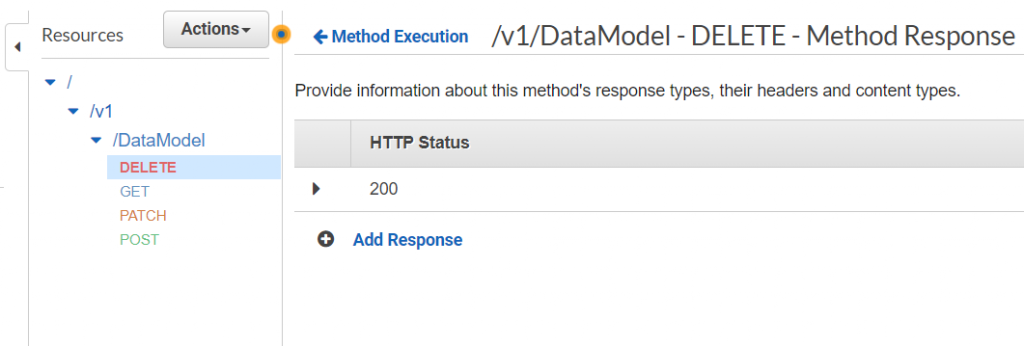
For each of the end points, we have to add a Method Response 200, to do this select on the Delete endpoint.

Then select the Method Response link.
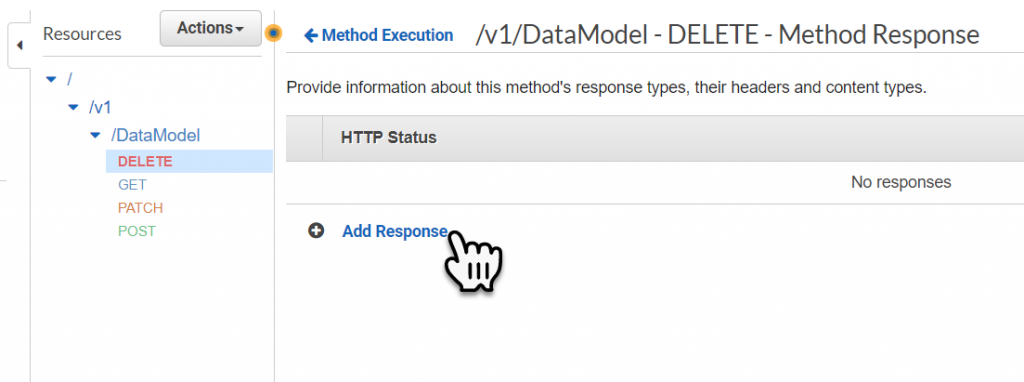
To add the 200 Method Response select the Add Response link.
Within the HTTP Status key in 200, and then Select the Check Mark to approve the change.
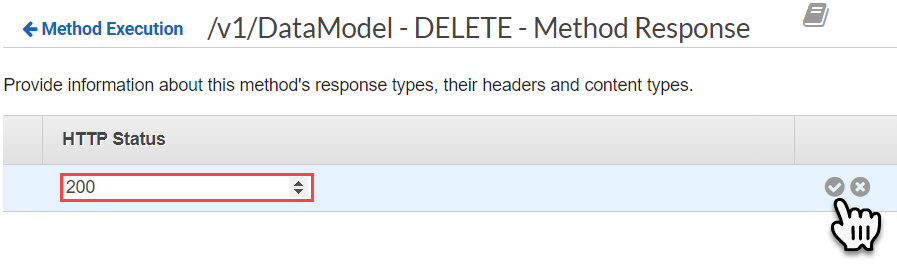
Once completed repeat these steps for the other end points (Get, Patch, Post).
Enabling CORS
Next we need to enable CORS for all the end points, select on the DataModel part of the end point.
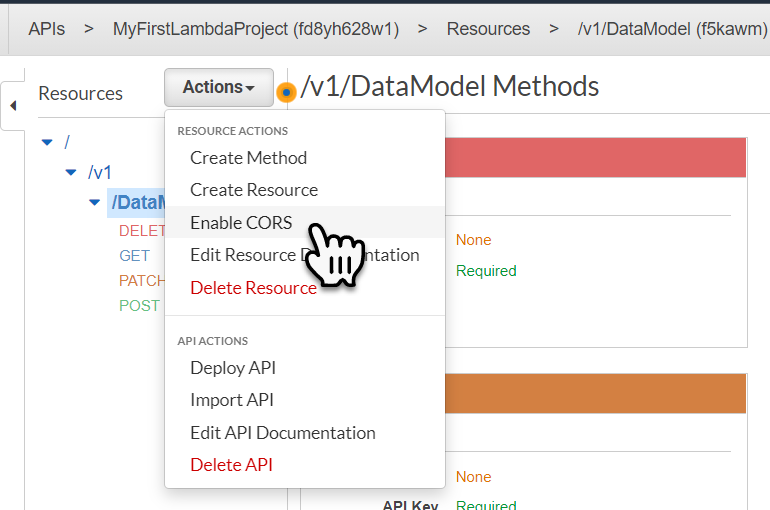
To enable CORS select the Actions dropdown and then select Enable CORS from the contextual menu.
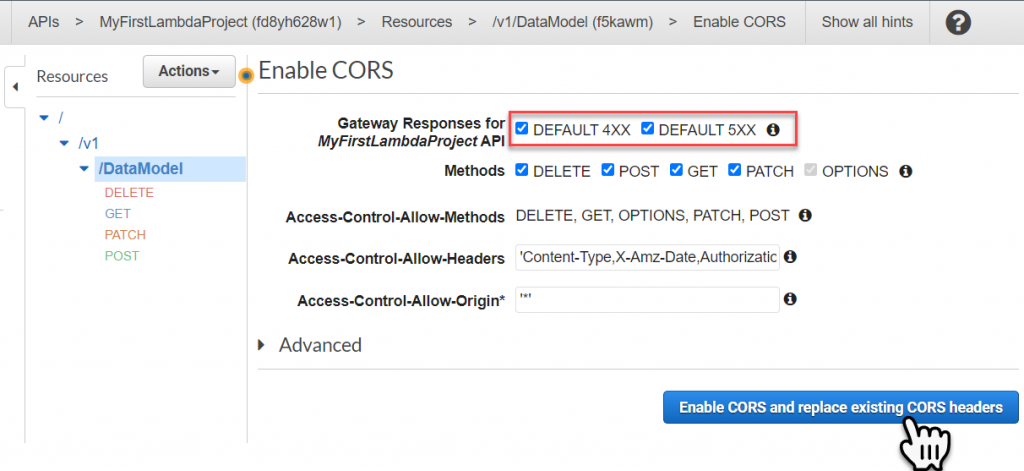
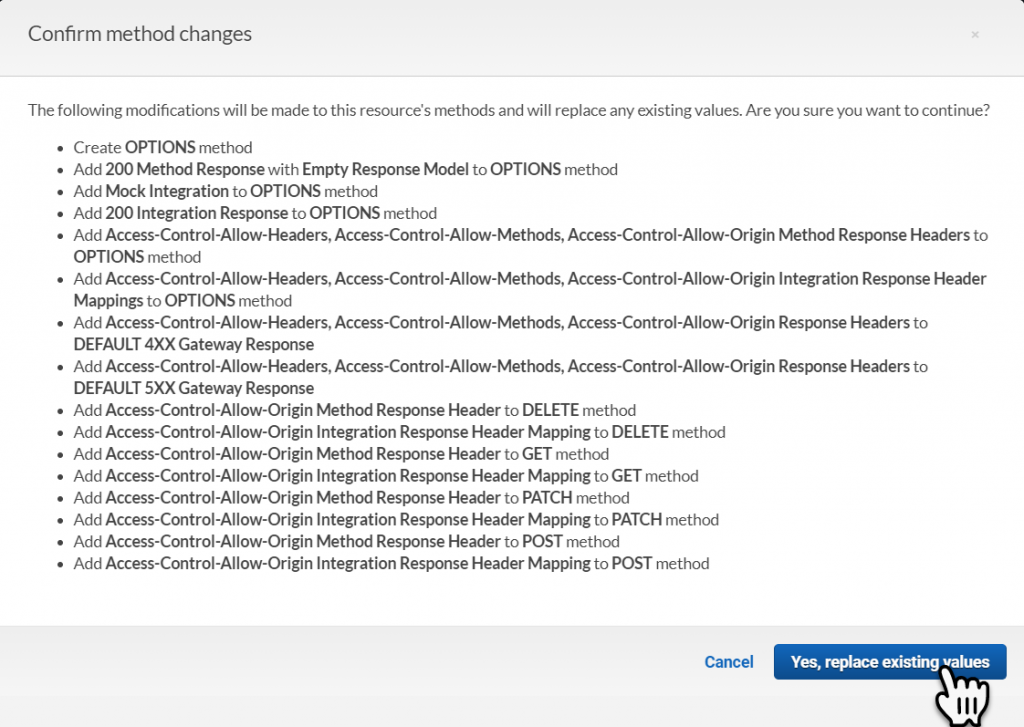
Before applying CORS, we must enable ‘Default 4XX’ and ‘Default 5XX’, then select Enable CORS and Replace Existing CORS Headers.
To stop accidental application of CORS headers, a warning dialogue will be displayed select Yes, Replace Existing Values in the dialogue window to continue.
The first time we enable CORS we will get some errors, four of these are fine, these are the four Integration Responses. This is normal when working and deploying a Lambda function with an API Gateway. Notice that we now have an additional end point Options, and the first three errors messages are in connection with this, so we have one more thing to fix.
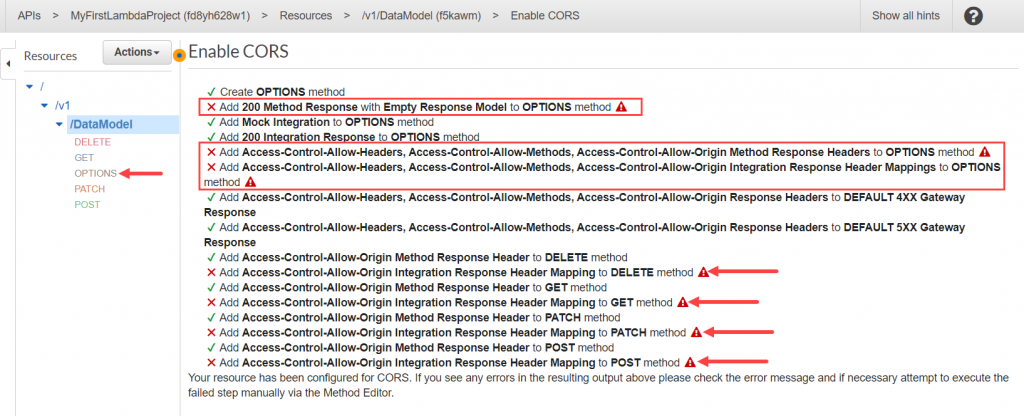
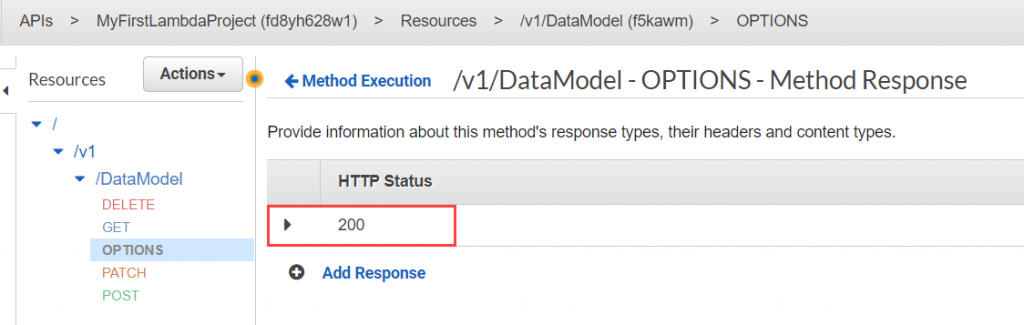
Select the Options end point and add a 200 Method Response as we did before.
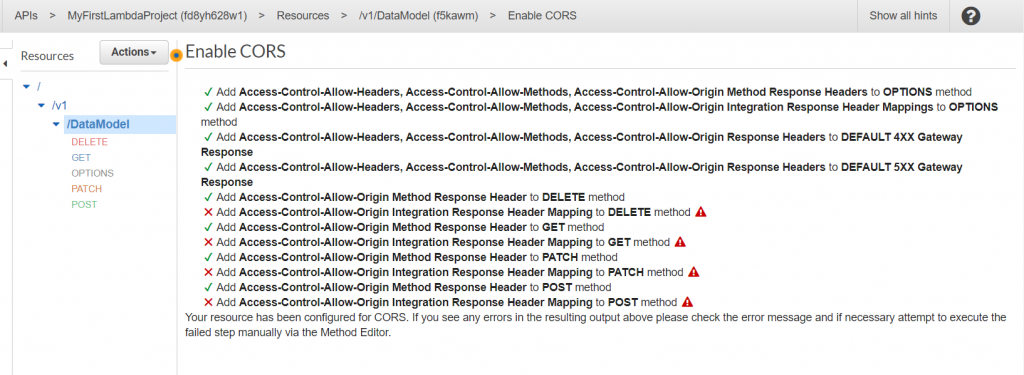
Then we will again Enable CORS, this time we should only get the four Integration Response Errors.
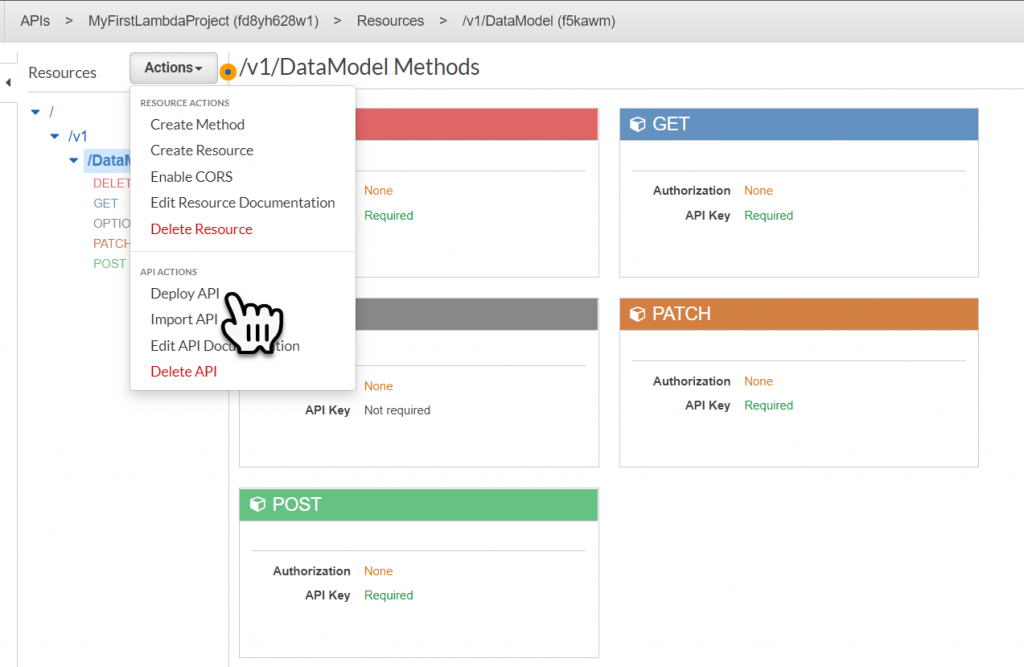
Deploying the API
To update the API Gateway with our changes, we must redeploy the API. To do this select on the DataModel part of the end point. Then select Deploy API from the contextual menu.
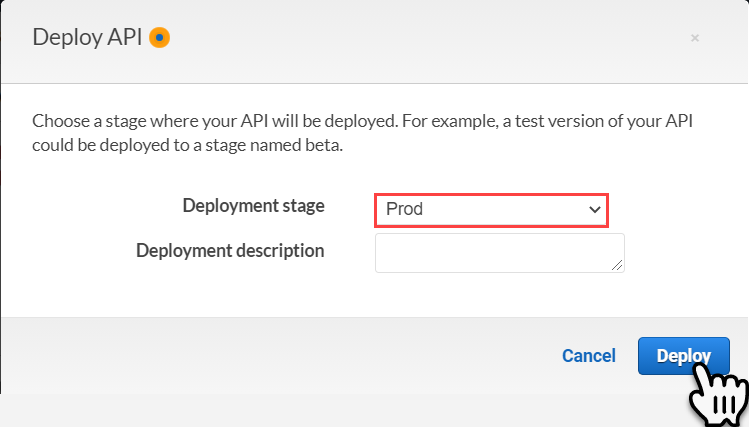
Within the Deploy API dialogue window change the Deployment Stage to ‘Prod’ and select the Deploy button, to initiate the API deployment.
Testing
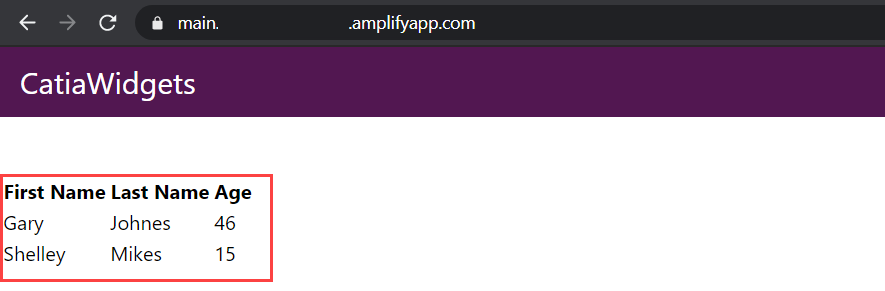
If we now go to our webpage, and refresh it we can now see that the data loads into the React component and is displayed on the web page. However we are still using ‘*’ to define which origins are allowed to request resources.
Allowed Origin End Point
Back within the Starup.cs file we will replace the “*” with the end point of the Amplify website (do not put the end slash in place), then, Publish the Lambda C# Code
public void ConfigureServices(IServiceCollection services)
{
services.AddCors(options =>
{
options.AddPolicy(
name: MyAllowSpecificOrigins,
builder =>
{
builder.WithOrigins("https://main.xxxxxxxxxxxx.amplifyapp.com");
});
});
services.AddControllers();
services.AddSingleton<IDataModelProcessor, DataModelProcessor>();
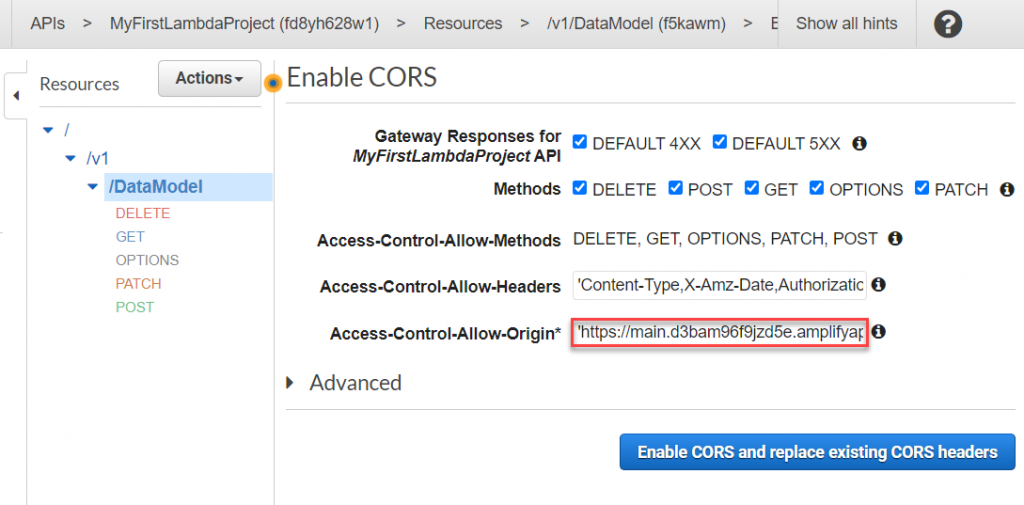
}Enable CORS on the API Gateway, this time we wont use ‘*’ we will use the Amplify website URL again without the end slash.
Finally, redeploy the API, we can now ensure that only our Amplify website can request data across origins.
React Code
Below is the React Component Code I used to build my data table.
import React, { Component} from 'react';
import axios from 'axios'
import Table from "./Table";

import './Table.css';

class DataModelViewComponent extends Component {

    constructor(props) {
        super(props)
        this.state = {
            users: [],
            loading: true
        }
    }

    async getUsersData() {

        var config = {
            method: 'get',
            url: 'https://YYYYYYYYYY.execute-api.eu-west-1.amazonaws.com/Prod/v1/DataModel',
            headers: {
                'x-api-key': 'XXXXXXXXXXXXXXXXXXXXXXXXXXXXXXXXXXXXXXXXXX'
            }
        };

        const res = await axios(config)
        console.log(res.data)
        this.setState({ loading: false, users: res.data })
    }

    componentDidMount() {
        this.getUsersData()
    }

    render() {

        const columns = [
            {
                Header: 'First Name',
                accessor: 'firstName',
            },
            {
                Header: 'Last Name',
                accessor: 'lastName',
            },
            {
                Header: 'Age',
                accessor: 'age',
                className: 'HeaderAge',
            }
        ]

        return (
            <div className="App">
                <Table columns={columns} data={this.state.users} />
            </div>
        )
    }
}

export default DataModelViewComponent;