Table of Contents
C# Upload File to AWS S3 Bucket
In this post I’m going to show you how to upload files to an AWS S3 Bucket, if you don’t know what that is you can check out the AWS support pages for S3Buckets, but in the long and short of things its a file storage system hosted in the AWS Cloud Services portfolio.
Before we start you will need an AWS account, which is free but will require a credit card. Once you have signed up for an AWS account the first thing we are going to do is create an S3 bucket.
Create an S3 Bucket
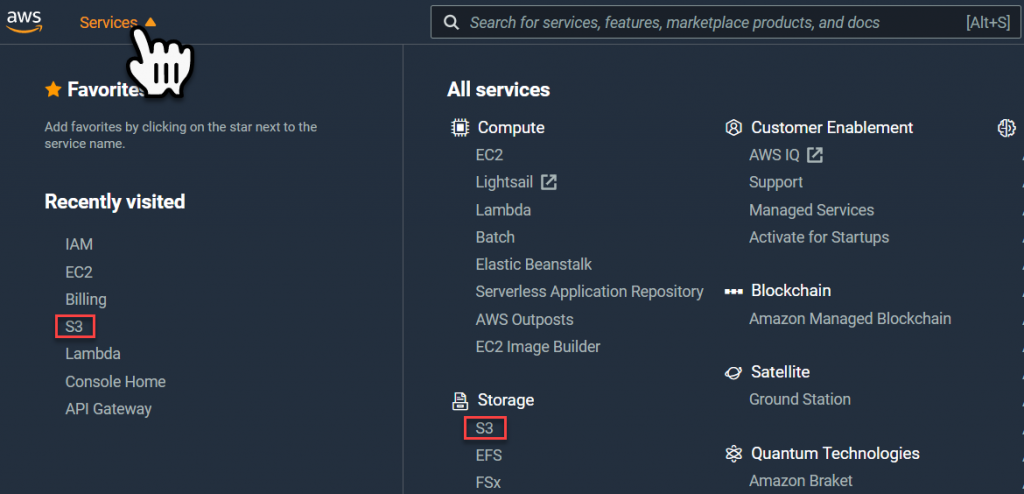
Within the AWS portal, select the Services link, then select one of the S3 links, or key in ‘S3’ into the search bar. then select the S3 link.
Within the S3 portal, select the Create Bucket button.

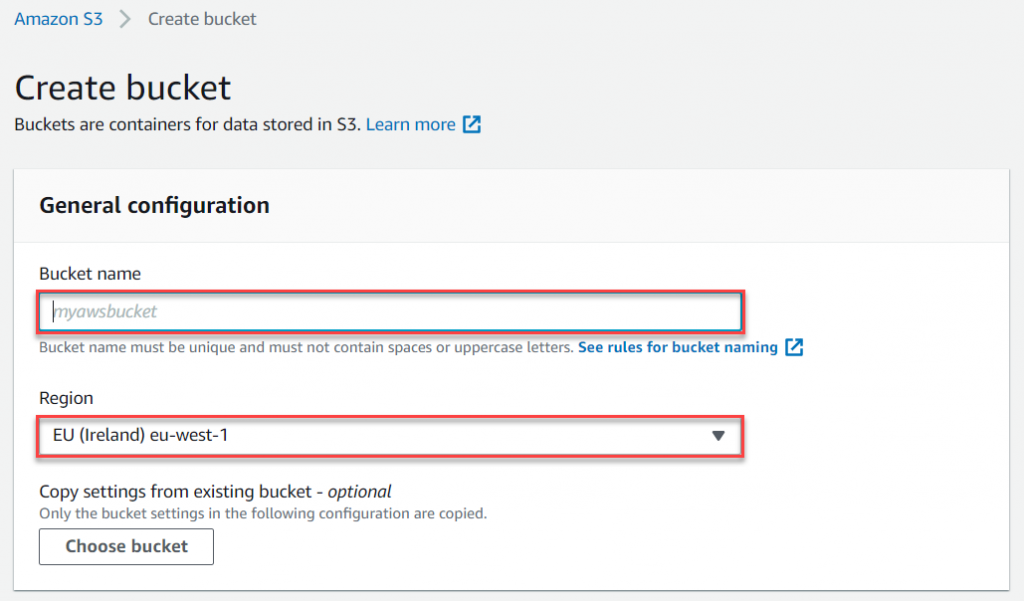
Within the Create Bucket page, key-in a new bucket name and then select a region to host the bucket.
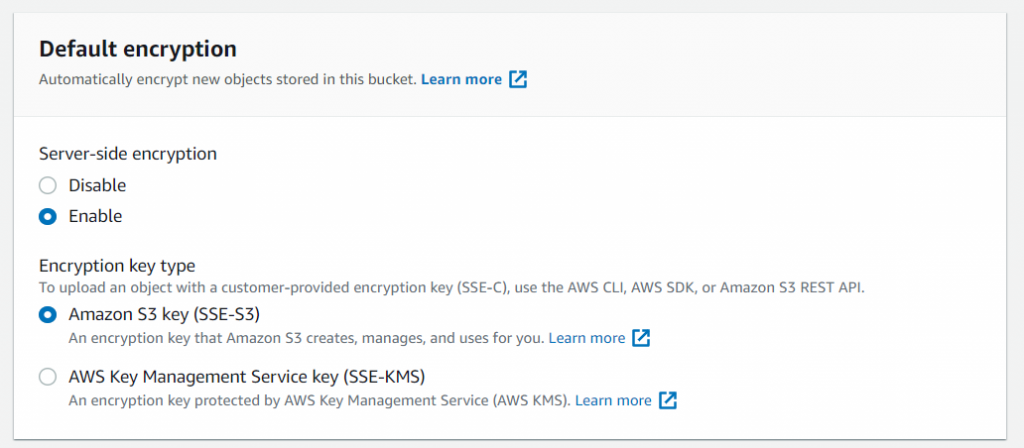
Then scroll down to the Default Encryption section and enable the Server-Side Encryption, and use the default Encryption Key Type – ‘Amazon S3 key (SSE-S3).
Select the ‘Create Bucket’ button at the bottom of the page, to complete the creation of the bucket.

AWS Access keys
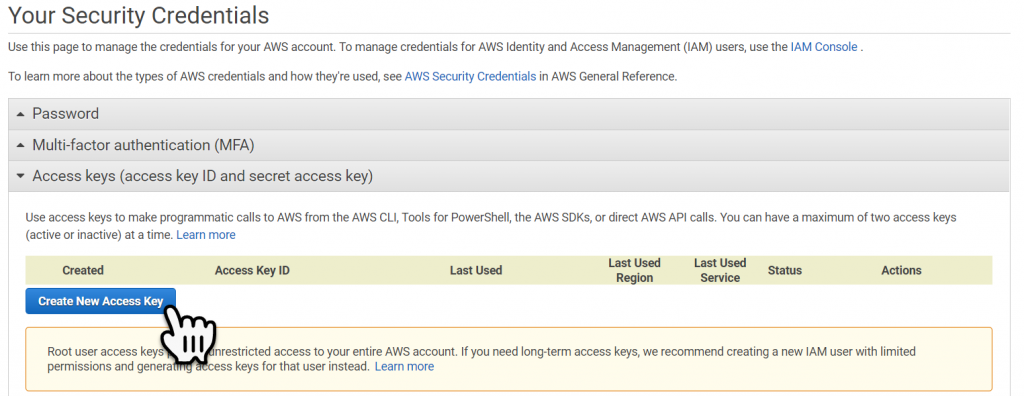
Next we have to create some security credentials to allow the C# application to access the bucket. To do this, within the AWS portal in the upper right-hand corner select the dropdown next to your username, and then select ‘My Security Credentials‘ from the dropdown menu.

Expand the Access Keys section and then select ‘Create new Access Key’.
Either take note of the new Access keys or download the file, then select close.

Building the C# Application
Within Visual Studio or your IDE of choice, create a new solution and add a Dot.Net Core ‘Console Application’, then create a new ‘Project Folder’ as shown below:

Within the Project Folder create two new classes; AmazonUploader, and SecretConsumer.

Next, well add the NuGet packages required, ensure that the six packages shown below are added:

This is not the recommended, way in which to store secrets, but was simpler than the inbuilt secrets manager within visual studio core (but this was really complex, and still not secure) later on I will show you how to use the AWS Secrets manager, which is the preferred method when working with the AWS infrastructure.
For now add a .JSON file to the Project folder called ‘appSecrets.json’. and construct the JSON file shown below, filling in the AWS Secret Access keys generated earlier.

To recover the two secrets well create the code for the SecretsConsumer, which we will use to recover the keys from the json file.
//SecretConsume.cs
using Microsoft.Extensions.Configuration;
using System;
using System.IO;
namespace TestProgram.UploadToS3Demo
{
    public class SecretConsumer
    {
        ConfigurationBuilder _builder = null;
        public string AWSAccessKey {
            get
            {
                string returnString = string.Empty;
                try
                {
                    IConfigurationRoot configuration = _builder.Build();
                    returnString = configuration.GetConnectionString("AWSAccessKey");
                }
                catch(Exception ex)
                {
                    Console.WriteLine(ex.Message);
                }
                return returnString;
            }
        }
        public string AWSSecretKey {
            get
            {
                string returnString = string.Empty;
                try
                {
                    IConfigurationRoot configuration = _builder.Build();
                    returnString = configuration.GetConnectionString("AWSSecretKey");
                }
                catch (Exception ex)
                {
                    Console.WriteLine(ex.Message);
                }
                return returnString;
            }
        }
        public SecretConsumer()
        {
            this._builder = (ConfigurationBuilder)new ConfigurationBuilder()
            .SetBasePath(Directory.GetCurrentDirectory())
            .AddJsonFile("appSecrets.json", optional: false, reloadOnChange: true);
        }
    }
}
Next well create the code for the Uploader;
//AmazonUploader.cs
using Amazon;
using Amazon.S3;
using Amazon.S3.Transfer;
namespace TestProgram.UploadToS3Demo
{
    public class AmazonUploader
    {
        public bool sendMyFileToS3(string localFilePath, string bucketName, string subDirectoryInBucket, string fileNameInS3)
        {
            // input explained :
            // localFilePath = the full local file path e.g. "c:\mydir\mysubdir\myfilename.zip"
            // bucketName : the name of the bucket in S3 ,the bucket should be alreadt created
            // subDirectoryInBucket : if this string is not empty the file will be uploaded to
            // a subdirectory with this name
            // fileNameInS3 = the file name in the S3
            // create an instance of IAmazonS3 class ,in my case i choose RegionEndpoint.EUWest1
            // you can change that to APNortheast1 , APSoutheast1 , APSoutheast2 , CNNorth1
            // SAEast1 , USEast1 , USGovCloudWest1 , USWest1 , USWest2 . this choice will not
            // store your file in a different cloud storage but (i think) it differ in performance
            // depending on your location
            SecretConsumer secretConsumer = new SecretConsumer();
            IAmazonS3 client = new AmazonS3Client(secretConsumer.AWSAccessKey, secretConsumer.AWSSecretKey, RegionEndpoint.EUCentral1);
            // create a TransferUtility instance passing it the IAmazonS3 created in the first step
            TransferUtility utility = new TransferUtility(client);
            // making a TransferUtilityUploadRequest instance
            TransferUtilityUploadRequest request = new TransferUtilityUploadRequest();
            if (subDirectoryInBucket == "" || subDirectoryInBucket == null)
            {
                request.BucketName = bucketName; //no subdirectory just bucket name
            }
            else
            {   // subdirectory and bucket name
                request.BucketName = bucketName + @"/" + subDirectoryInBucket;
            }
            request.Key = fileNameInS3; //file name up in S3
            request.FilePath = localFilePath; //local file name
            utility.Upload(request); //commensing the transfer
            return true; //indicate that the file was sent
        }
    }
}
Testing the Application
Finally we can add the code to the console application to test the application, we have to provide the:
- The local file path to the file being copied to the S3 bucket.
- The name of the S3 bucket.
- If there are sub folders within the bucket, then we have to define the directory path, in this case we don’t.
- and the name of the file, once it’s copied to the S3 bucket.
//Program.cs
using TestProgram.UploadToS3Demo;
namespace TestProgram
{
class Program
{
static void Main(string[] args)
{
// preparing our file and directory names
string fileToBackup = @"C:\Users\ma_je\Downloads\TestS3uploadFile.txt"; // test file path from the local computer
string myBucketName = "catiawidgetsbkup"; // your s3 bucket name goes here
string s3DirectoryName = ""; // the directory path to a sub folder goes here
string s3FileName = @"TestS3uploadFile.txt"; // the name of the file when its saved into the S3 buscket
AmazonUploader myUploader = new AmazonUploader();
myUploader.sendMyFileToS3(fileToBackup, myBucketName, s3DirectoryName, s3FileName);
}
}
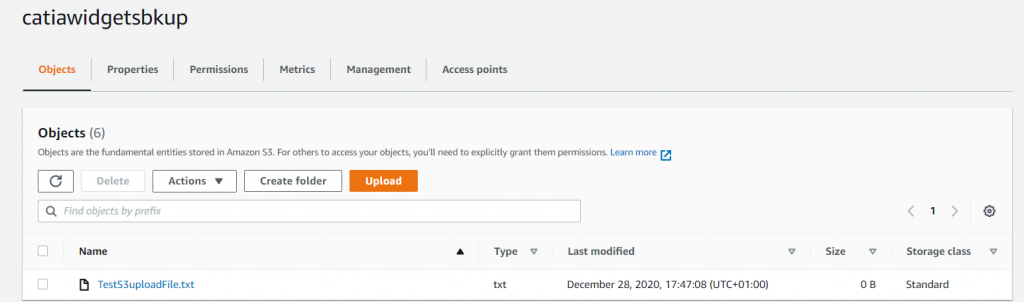
}If we execute the console application we can see that the file has been copied from my local machine to the S3 bucket.